A well-maintained battery ensures your Grom starts smoothly, even after being idle for weeks. It also prevents unnecessary breakdowns, saving you both time and money. Unfortunately, motorcycle batteries can lose charge quickly, especially if you don’t ride your Grom regularly. This is where proper battery maintenance becomes crucial.
In my experience, neglecting battery care leads to problems like slow starts or even complete failure. These issues are frustrating and can often be avoided by using a tool like a battery tender. Throughout this article, I’ll guide you through how to choose and use a battery tender to keep your Honda Grom running at its best.
The goal of this guide is simple: to help you understand why a battery tender is important for your Honda Grom and how to use it properly. Whether you’re a new rider or an experienced motorcyclist, this article will teach you how to:
- Choose the right battery tender for your Honda Grom.
- Use it safely and effectively.
- Extend the life of your motorcycle battery.
By the end of this guide, you’ll have all the knowledge you need to keep your Grom’s battery in top shape, ensuring it’s always ready to ride. Let’s get started!
Table of Contents
ToggleUnderstanding Battery Tenders
What Is a Battery Tender?
A battery tender is a small, smart device that keeps your motorcycle battery fully charged and healthy. Unlike a regular battery charger, which can overcharge and damage your battery, a battery tender is designed to provide a steady, low-level charge. This makes it ideal for motorcycles like the Honda Grom, especially if you don’t ride daily.
Think of a battery tender as a maintenance tool. It monitors the charge level of your battery and automatically adjusts the power to keep it at an optimal level. This means you can connect your battery tender and leave it plugged in without worrying about overcharging. For Grom owners, this is a lifesaver, particularly during long periods of storage or infrequent use.
How Battery Tenders Differ from Regular Chargers
You might wonder: why not just use a regular battery charger? While they seem similar, battery tenders and chargers have key differences.
Charging Speed: Regular chargers often deliver a high current quickly, which can overcharge and overheat the battery if left unattended. A battery tender, on the other hand, delivers a slow, consistent charge that’s safer for smaller motorcycle batteries.
Automatic Shut-Off: Most battery tenders have a built-in shut-off feature. Once the battery is fully charged, the tender switches to “float mode,” maintaining the charge without overloading the battery. Regular chargers usually lack this feature, which can lead to damage over time.
Designed for Maintenance: A battery tender is specifically made for long-term use. You can connect it to your Honda Grom’s battery and leave it on for weeks or months, ensuring the battery stays ready to go. Regular chargers are better suited for quick, one-time charging and aren’t safe for extended use.
Benefits of Using a Battery Tender for Your Honda Grom
Using a battery tender for your Honda Grom has several advantages:
- Prolongs Battery Life: Over time, batteries naturally lose their ability to hold a charge. By keeping the charge level consistent, a tender reduces wear and tear, extending your battery’s lifespan.
- Prevents Battery Issues: A dead battery is inconvenient and costly. A tender helps avoid this by maintaining the charge, even during long periods of storage.
- Convenience for Infrequent Riders: If you don’t ride your Grom daily, the battery can drain just by sitting idle. A tender keeps it topped up, so your motorcycle is always ready to ride.
- Cost-Effective: While a battery tender requires an initial investment, it saves money in the long run by reducing the need for battery replacements and emergency jump-starts.
Choosing the Right Battery Tender for Your Honda Grom
Before you buy a battery tender, it’s essential to know what type of battery your Honda Grom has. Most Groms come equipped with lead-acid batteries, specifically the AGM (Absorbent Glass Mat) type. However, many riders upgrade to lithium-ion batteries for their lighter weight and better performance.
Each type of battery requires a compatible tender. For example:
- AGM Batteries: These work well with most traditional battery tenders.
- Lithium-Ion Batteries: These require a tender specifically designed for lithium technology to avoid overcharging or overheating.
Always check your battery’s specifications and the tender’s compatibility before purchasing. Using the wrong tender could damage your battery and reduce its lifespan.
Key Features to Look For
When choosing a battery tender for your Honda Grom, look for these essential features:
Automatic Shut-Off and Float Mode
A good tender should stop charging automatically when the battery is full. It should then switch to float mode, maintaining the charge without overloading.
Amperage
For motorcycles like the Honda Grom, a tender with an output of 0.75 to 1.25 amps is ideal. This provides a slow, steady charge that’s safe for smaller batteries.
Safety Features
Look for tenders with built-in safety measures like:
- Reverse polarity protection: Prevents damage if the clamps are connected incorrectly.
- Short circuit protection: Avoids accidents caused by electrical faults.
Ease of Use
Features like quick-connect terminals make it easy to set up the tender without constantly removing and reinstalling the battery.
Weather Resistance
If you store your Grom outdoors or in a damp area, consider a tender that’s waterproof or weather-resistant.
Top Recommended Battery Tenders for Honda Grom
Here are three highly-rated battery tenders suitable for the Honda Grom:
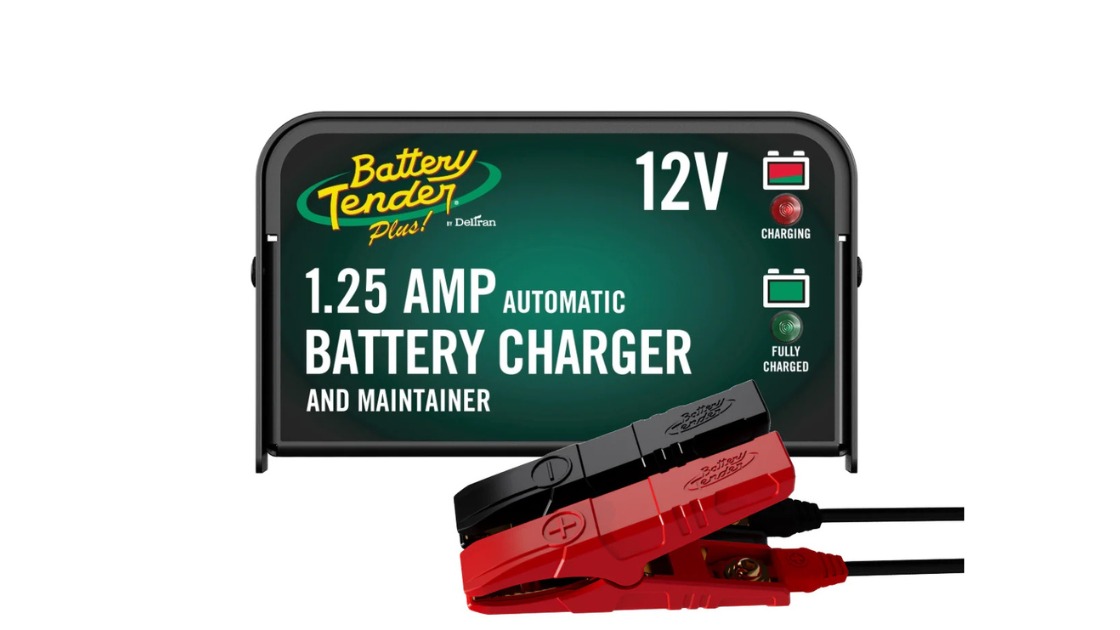
Battery Tender Plus 12V Battery Charger and Maintainer
- Why it’s great: Reliable and versatile, this tender is compatible with AGM and lead-acid batteries. It features a smart microprocessor to prevent overcharging.
- Best for: Riders who prefer a trusted brand with years of positive reviews.
Battery Tender Junior 12V Charger and Maintainer
- Why it’s great: Compact and affordable, this tender is perfect for smaller batteries like the one in your Honda Grom. It’s easy to use and has automatic float mode.
- Best for: Beginners or riders on a budget.
NOCO Genius1, 1-Amp Fully-Automatic Smart Charger
- Why it’s great: Compatible with both AGM and lithium-ion batteries, this smart charger offers advanced safety features and a compact design.
- Best for: Grom owners who’ve upgraded to a lithium-ion battery.
How to Properly Use a Battery Tender with Your Honda Grom
Before you connect a battery tender to your Honda Grom, safety should be your top priority. Following these steps ensures that both you and your motorcycle are protected:
- Turn Off the Motorcycle: Make sure your Honda Grom is completely off, with the ignition key removed. This prevents any electrical interference during the process.
- Inspect the Battery and Tender: Check the battery for signs of damage, such as cracks or corrosion on the terminals. Inspect the tender’s cables for any fraying or wear.
- Work in a Safe Area: Use the tender in a well-ventilated space away from flammable materials. If you’re working in a garage, open the door or windows to allow airflow.
Step-by-Step Guide to Connecting the Battery Tender
Once you’ve taken the necessary precautions, follow these steps to connect your battery tender:
Locate the Battery:
- The Honda Grom’s battery is typically located under the seat. Use the seat release mechanism to lift the seat and access the battery compartment.
- Some Grom models may have a battery cover secured with screws, so keep a screwdriver handy if needed.
Attach the Tender’s Connectors:
- Identify the positive and negative terminals on your battery. The positive terminal is usually marked with a + sign, and the negative terminal is marked with a – sign.
- Connect the tender’s red clamp to the positive terminal and the black clamp to the negative terminal. Make sure the clamps are secure to avoid disconnections during charging.
Plug in the Battery Tender:
- Once the connectors are attached, plug the battery tender into a standard electrical outlet. Most tenders will have indicator lights to show that the connection is successful and charging has started.
Verify the Connection:
- Check the tender’s indicator light to ensure it’s functioning properly. For example, a green light might mean the battery is fully charged, while a yellow or red light indicates charging is in progress.
Monitoring the Charging Process
One of the advantages of using a battery tender is that it requires minimal supervision. However, it’s still a good idea to check on the charging process occasionally. Here’s what to look for:
- Indicator Lights: Most tenders use a light system to communicate the charging status. For example:
- A steady yellow light usually means the battery is charging.
- A green light indicates the battery is fully charged and the tender is in float mode.
- Battery Temperature: While charging, the battery should not feel hot to the touch. If it does, disconnect the tender immediately and inspect for issues.
Disconnecting and Storing the Battery Tender
Once the battery is fully charged, follow these steps to safely disconnect and store the tender:
- Unplug the Tender:
- Disconnect the tender from the electrical outlet first to prevent any electrical surges.
- Remove the Connectors:
- Start by removing the black clamp from the negative terminal, followed by the red clamp from the positive terminal.
- Secure the Battery Compartment:
- Reattach the battery cover (if applicable) and lower the seat back into place.
- Store the Tender Properly:
- Coil the tender’s cables neatly to prevent tangling or damage.
- Store the tender in a dry, cool place away from direct sunlight or moisture.
Using a battery tender for your Honda Grom is a straightforward process, but following these steps ensures safety and effectiveness. With proper use, you can prevent battery issues and keep your Grom ready to ride at any time.
Maintenance Tips for Honda Grom Batteries
Keeping your Honda Grom’s battery in good condition requires regular care. Routine inspections and cleaning go a long way in ensuring optimal performance.
Check for Corrosion:
Over time, battery terminals can develop a buildup of white or greenish corrosion. This can interfere with the battery’s ability to charge properly.
- How to clean: Mix a tablespoon of baking soda with water to create a paste. Use a small brush (like an old toothbrush) to gently scrub the terminals. Wipe clean with a damp cloth and dry thoroughly.
Inspect for Damage:
Look for cracks, bulges, or leaks in the battery casing. If you notice any damage, it’s a sign the battery may need replacing. Continuing to use a damaged battery can be dangerous.
Test the Voltage:
Use a multimeter to check the battery’s voltage periodically.
- For AGM batteries, the voltage should stay above 12.6V when fully charged.
- For lithium-ion batteries, refer to the manufacturer’s specifications.
Optimal Storage Practices
If you’re planning to store your Honda Grom for an extended period (such as during winter), proper storage is critical to maintaining battery health.
Disconnect the Battery:
- Remove the battery from the motorcycle if you won’t be using it for months. This prevents slow drain caused by the Grom’s electrical components.
Store in a Cool, Dry Place:
- Extreme temperatures can damage the battery. Store it in a location where the temperature remains consistent, ideally between 10-25°C (50-77°F).
Use a Battery Tender:
- Leaving the battery connected to a tender during storage keeps it charged and prevents sulfation (a buildup of lead sulfate crystals in lead-acid batteries). This is particularly important for riders who don’t plan to ride their Grom regularly.
Signs of a Failing Battery and When to Replace
Even with proper care, motorcycle batteries don’t last forever. Knowing the signs of a failing battery helps you avoid unexpected breakdowns.
- Slow Engine Crank:
If your Grom takes longer than usual to start, it could be a sign that the battery isn’t holding a charge. - Dim Lights:
Weak headlights or dashboard lights often indicate a battery problem. - Frequent Recharging:
If you find yourself using the battery tender more often than before, the battery may be nearing the end of its life. - Physical Damage:
As mentioned earlier, cracks, leaks, or bulges in the battery case are signs it’s time for a replacement. - Age:
Most motorcycle batteries last about 2-5 years, depending on usage and maintenance. If your battery is nearing this age range, start planning for a replacement.
Pro Tip: Choosing a Replacement Battery
When replacing your Honda Grom’s battery, consider upgrading to a lithium-ion battery for better performance and longer life. Just make sure your battery tender is compatible with lithium technology.
Conclusion
Maintaining your Honda Grom’s battery is essential for a smooth and reliable riding experience. A battery tender is a simple but powerful tool that ensures your battery stays in optimal condition, whether you’re riding daily or storing your Grom for weeks or months. By using a battery tender, you can avoid common problems like dead batteries, sulfation, and reduced battery lifespan.
Throughout this guide, we’ve explored:
- What a battery tender is and how it works.
- The benefits it provides, including prolonged battery life and peace of mind.
- How to choose the right tender and use it safely.
- Tips for maintaining your battery and avoiding costly replacements.
Taking care of your motorcycle battery doesn’t have to be complicated. By investing in a quality battery tender and following the simple steps outlined in this guide, you can save time, money, and frustration in the long run. Whether you’re a new rider or a seasoned Grom enthusiast, these best practices will ensure your battery is always ready when you need it.
I hope this guide has provided you with the information you need to keep your Honda Grom’s battery in top shape. If you have any questions, experiences to share, or additional tips, I’d love to hear from you. Drop a comment below or share this article with fellow Grom riders who might benefit from it. Together, we can make motorcycle maintenance easier for everyone!
Thank you for reading, and happy riding!
FAQs About Battery Tenders and Honda Groms
Can I Use a Battery Tender for Other Motorcycles?
Yes, you can! Battery tenders are versatile and compatible with a wide range of motorcycles, not just the Honda Grom. However, there are a few things to consider:
Battery Type: Ensure the tender is compatible with the specific type of battery in the motorcycle. For example, if your other motorcycle has a lithium-ion battery, make sure the tender supports lithium technology.
Amperage: Smaller motorcycles like the Grom typically require a tender with lower amperage (around 0.75 to 1.25 amps). Larger bikes may need a tender with a slightly higher output.
Connector Compatibility: If you plan to use one tender for multiple bikes, check if it comes with quick-connect adapters or additional connectors that work for different models.
How Do I Know If My Battery Is Fully Charged?
Battery tenders come with indicator lights that make it easy to know when your Honda Grom’s battery is fully charged. Here’s how to interpret the most common signals:
Charging Light (Yellow/Red): This indicates that the tender is actively charging the battery.
Fully Charged Light (Green): This means the battery is at full capacity, and the tender has switched to float mode.
Error Indicators: Some tenders have error lights to alert you if something is wrong, such as reversed connections or a faulty battery. Always consult the tender’s manual if an error light appears.
Can I Use a Regular Charger Instead of a Battery Tender?
While it’s possible to use a regular charger, it’s not recommended for maintaining a Honda Grom’s battery. Here’s why:
Overcharging Risk: Regular chargers don’t stop automatically when the battery is full. This can lead to overcharging, which damages the battery.
Inconvenience: A regular charger requires constant monitoring to prevent issues. In contrast, a battery tender is a “set it and forget it” solution.
Battery Health: Battery tenders are designed to maintain the health of smaller motorcycle batteries, ensuring they last longer and perform better.

