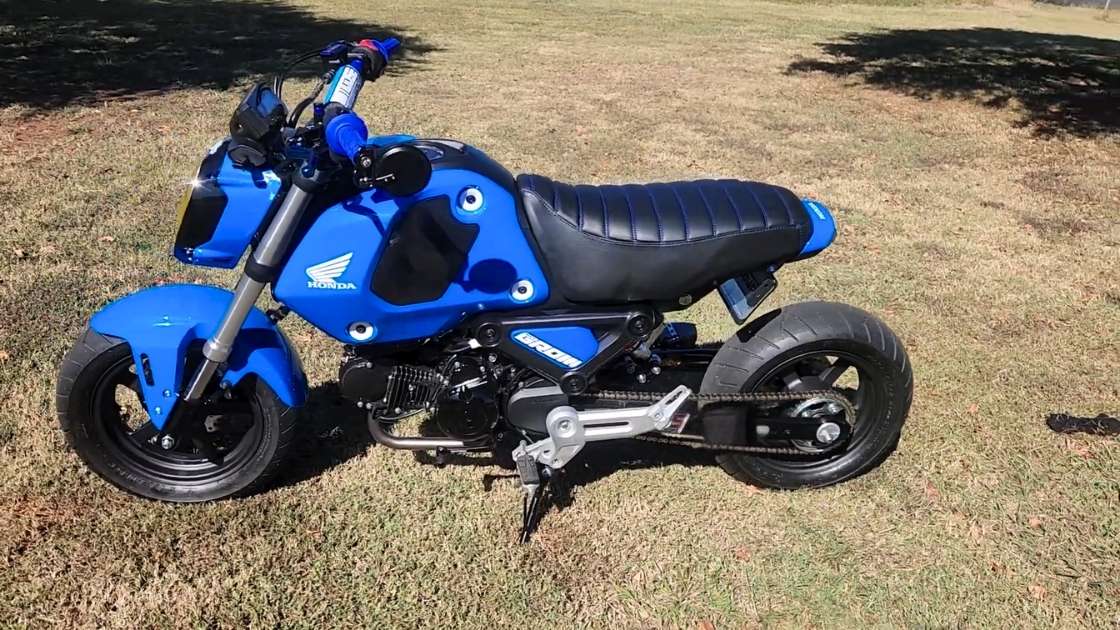
If you’re thinking about giving your Honda Grom a unique twist, lowering it might be just the upgrade you need! Imagine cruising through the streets on a bike perfectly customized to your height and style. A Honda Grom Lowered isn’t just about looks; it’s about creating a ride that fits you like a glove, making every turn and stop feel smoother and more controlled. In this guide, I’ll walk you through exactly how to lower your Honda Grom, why it might be the perfect mod for you, and what to consider before taking the plunge. Ready to take your Grom to the next level? Let’s get started!
Table of Contents
ToggleWhy Lower a Honda Grom?
The Honda Grom is already a favorite because it’s light, nimble, and fun to ride, especially around town. But lowering it can have some additional perks, depending on what you’re looking for. Here’s why lowering a Grom might be a good option for you:
- Better Fit for Shorter Riders: If you’re on the shorter side, lowering your Grom can make it more comfortable. Lowering the seat height means you can put your feet on the ground more easily, which can make stops and slow rides more manageable.
- Improved Handling and Stability: Lowering the bike lowers its center of gravity. This can help improve stability when taking tight turns or navigating city streets.
- Stylish Look: A lowered Grom can look sleek and custom, adding a unique flair. Many riders choose this modification just for the aesthetic appeal—it gives the Grom a sportier, more grounded appearance.
Methods to Lower a Honda Grom
There are a few ways to lower a Honda Grom, each with its own steps and tools. Let’s break down the main methods:
- Suspension Adjustments: Adjusting the suspension, particularly the front forks and rear shock, is a common way to lower a motorcycle. For the Grom, this can mean sliding the front forks up slightly in their clamps and reducing the rear suspension height.
- Front Fork Adjustments: You can slightly lower the front by loosening the clamps that hold the forks and moving them up through the triple tree. Just be careful not to go too far; a small adjustment can make a big difference.
- Rear Shock Adjustments: Some aftermarket shocks allow you to adjust the height. Look for shocks specifically designed for the Grom that offer a lowered setup.
- Front Fork Adjustments: You can slightly lower the front by loosening the clamps that hold the forks and moving them up through the triple tree. Just be careful not to go too far; a small adjustment can make a big difference.
- Lowering Kits: Lowering kits are designed to lower the height of the bike without needing too much mechanical know-how. These kits often come with parts like lowering links or brackets for the rear shock, making it easier to drop the height without complex adjustments.
- Swingarm Extensions: If you’re aiming for a stretched and lowered look, swingarm extensions are a great option. A stretched swingarm not only gives your Grom a unique style but also stabilizes it at higher speeds.
- Custom Modifications (Seat Height and Tires): For a minor drop, you could modify the seat padding to lower the seat height. Some riders also choose smaller tires, which can subtly lower the bike.
Each of these methods comes with its own level of complexity and cost, so it’s good to know your options before diving in.
Step-by-Step Guide to Lowering Your Honda Grom
Here’s a quick step-by-step guide if you’re ready to start lowering your Grom:
Preparation
- Gather the necessary tools: You’ll need basic wrenches, a torque wrench, and possibly a jack stand for stability.
- Set up a workspace: Make sure you have enough room to work comfortably and safely.
Installation Process
- Front Fork Lowering:
- Start by loosening the bolts on the triple tree, then carefully slide the forks upward by a small amount.
- Once the forks are in place, retighten the bolts to the correct torque specifications.
- Rear Shock Adjustment (if applicable):
- Install a lowering link if you’re using a lowering kit.
- Secure it properly and check for any alignment issues.
- Swingarm Extensions (if desired):
- Attach the extension to the rear swingarm, following the kit instructions.
- Double-check that everything is secure, as the swingarm directly affects stability.
Post-Installation Checks
- Test the Clearance: After lowering, check the bike’s ground clearance, especially with a rider on board. You don’t want it to scrape or bottom out.
- Suspension Test: Make sure the suspension still has enough travel and is working smoothly.
Potential Drawbacks and Considerations
Lowering your Grom can bring benefits, but it’s also important to consider the downsides:
- Reduced Ground Clearance: Lowering the bike means it will sit closer to the ground, which can make it harder to go over bumps or curbs. Keep this in mind if you’re planning to ride on uneven surfaces.
- Possible Impact on Ride Comfort: A lower bike may feel stiffer, especially if you’ve adjusted the suspension.
- Warranty and Insurance Concerns: Modifying a bike can sometimes affect its warranty or insurance, so check with your provider.
- Legal Considerations: Some areas have laws about how much a motorcycle can be modified, especially regarding ride height and clearance. Be sure to check any local regulations.
Maintenance and Upkeep of a Honda Grom Lowered
Once you’ve lowered your Grom, regular maintenance is key to keeping it in top shape:
- Inspect Components Regularly: Pay attention to the parts you’ve modified, like the lowering links or swingarm. Regularly check for any signs of wear or loosening.
- Suspension Checks: Lowering can affect how the suspension feels and performs. Adjust the suspension settings if you notice any stiffness or issues.
- Tire Maintenance: Lowering the bike can affect tire wear, so check your tires regularly to ensure they’re wearing evenly.
Testimonials and Case Studies
Many Honda Grom owners have chosen to lower their bikes and had great experiences with it. For instance, some riders find that it makes the Grom easier to handle in city traffic, while others love the unique look it gives their ride. Here are a few examples to give you an idea:
- David’s Story: David, a Grom enthusiast, found that lowering his bike made it feel much more comfortable for his shorter height. “I love how I can easily touch the ground at stops now. It gives me more confidence, especially in busy areas.”
- Samantha’s Experience: Samantha customized her Grom with both a lowering kit and a swingarm extension. “I love the look—it turns heads! Plus, the bike feels stable, especially at higher speeds.
Conclusion
Lowering a Honda Grom is a great way to make the bike feel unique and more suited to your height and style. Whether you’re looking for a slight drop to help with comfort or a full modification with a swingarm extension for style, there are many ways to lower a Grom. Just be sure to consider all aspects, from installation to maintenance, so you can enjoy your ride safely and confidently.
FAQs
Can I lower my Grom without a kit?
Yes, you can adjust the suspension or seat height for a small drop.
Is it safe to lower a Honda Grom?
Yes, but make sure you don’t lower it too much. Keep an eye on ground clearance and handling.
Will lowering my Grom void the warranty?
This depends on your dealer, so it’s best to ask before making changes.

