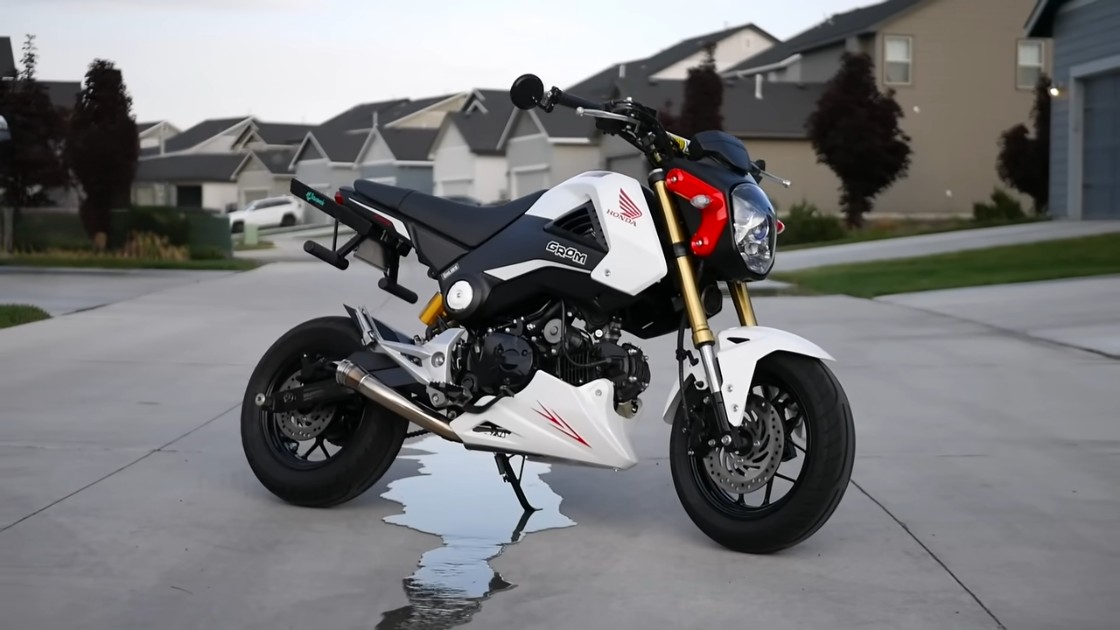
If you’ve got a Honda Grom, you already know it’s like the Swiss Army knife of motorcycles — small, versatile, and a blast to ride. But here’s the thing: no matter how much fun it is straight out of the box, there’s always room for a little more thrill, right? That’s where Honda Grom tuning comes in. Think of it like giving your bike a secret turbo boost. Imagine quicker takeoffs, sharper handling, and that deep, throaty exhaust sound that makes you smile every time you twist the throttle. Whether you’re new to tuning or a seasoned rider looking for fresh ideas, I’ve got a step-by-step guide that will help you turn your Grom into the ultimate riding machine. Ready to take your Grom from great to amazing? Let’s get started!
Table of Contents
ToggleWhat is Tuning, and Why Tune a Honda Grom?
Tuning is like giving your Honda Grom a little makeover, but instead of just changing how it looks, we’re upgrading how it performs. The goal of tuning is to make your bike run better, faster, and more efficiently. Whether it’s adding more horsepower, improving the handling, or just making it sound cooler, tuning can transform your riding experience.
I remember the first time I tuned my Grom. It felt like I unlocked a whole new bike! Suddenly, it was quicker off the line, and the exhaust had this deep growl that made heads turn. And the best part? It was surprisingly simple to do, with the right guidance.
Understanding the Basics of Tuning
Before we jump into the details, let’s go over the basics. There are a few key areas where you can tune or upgrade your Honda Grom:
- Engine Tuning: Boosts the power and efficiency of your engine.
- Exhaust Upgrades: Enhances sound and airflow.
- Air Intake Improvements: Increases the air going into the engine for better combustion.
- Suspension Modifications: Improves ride comfort and handling.
- ECU (Electronic Control Unit) Tuning: Adjusts the bike’s fuel and air mixture for optimized performance.
Think of these components as pieces of a puzzle. When they work together, they create a seamless riding experience that feels tailor-made for you.
Essential Upgrades for Honda Grom Performance
Engine Modifications
If you want more power from your Grom, engine upgrades are the place to start. One popular modification is a big bore kit. This kit increases the engine’s displacement, which means your engine can burn more fuel and air, creating more power. It’s like giving your Grom a stronger heartbeat. I opted for a 186cc big bore kit on my Grom; the difference was night and day. Suddenly, hills that used to slow me down were a breeze. If you’re considering a big bore kit, make sure you also upgrade your camshaft. A performance camshaft changes the timing of your engine’s valves, letting more air in and out. This is essential to get the most out of your engine upgrade.
Exhaust System Enhancements
An aftermarket exhaust system is one of the easiest ways to boost your Grom. The stock exhaust is designed to be quiet and efficient, but it limits airflow. Installing a performance exhaust can increase the airflow, reduce back pressure, and make your Grom sound amazing. I remember the first time I swapped out the exhaust on my Grom. The deep, throaty growl was music to my ears, and I noticed a slight increase in speed, too. Popular choices include brands like Yoshimura and Two Brothers Racing, both of which offer exhaust systems designed specifically for the Grom.
Air Intake Improvements
Think of the air intake as your bike’s lungs. The more air it can breathe in, the more power it can produce. By upgrading your air intake system, you’re allowing more fresh air into the engine, which improves combustion. Installing a high-flow air filter is a simple and effective way to start. It’s a quick swap that can be done in less than 10 minutes, and it makes a noticeable difference. For even better performance, consider adding a cold air intake system, which brings in cooler, denser air for improved power output.
Step-by-Step Guide to Tuning Your Honda Grom
Tuning your Honda Grom can seem daunting, but I’ll guide you through the process, breaking down each step so it feels like we’re doing it together. From preparation to fine-tuning, I’ve got you covered.
Preparation
Before we jump into modifying your Grom, let’s get everything ready. First, gather all the necessary tools and parts. You’ll need basic wrenches, screwdrivers, a torque wrench, and specific upgrades like a big bore kit, performance camshaft, high-compression piston, and an aftermarket exhaust. Also, have a stable bike stand ready. It’s crucial to work on a secure surface with good lighting so you can see what you’re doing and avoid any accidents. Safety is key here. Always wear gloves to protect your hands and safety glasses, especially when handling small, sharp parts. Disconnect the battery before you start working, particularly if you’ll be touching the bike’s electrical system. This helps prevent any short circuits. It’s a good idea to set up in a space where you can leave the bike for a few days if needed, in case you run into any issues or need more time.
Engine Tuning Process
Let’s get into the engine upgrades. If you’re looking to boost power, installing a big bore kit is one of the most impactful mods you can make. To start, you’ll need to remove the seat, side panels, and gas tank. This exposes the engine, making it easier to access. Next, drain the oil and coolant; you don’t want any spills when you open up the engine. With the fluids drained, carefully remove the cylinder head. This part might feel intimidating, but take your time and follow any instructions that come with your kit. Once the stock cylinder and piston are out, it’s time to install the new big bore components. Align the piston rings properly before inserting the piston — this step is critical for a smooth-running engine. Once everything is in place, reassemble the engine, making sure to use a torque wrench for precise tightening. Over-tightening can cause issues, so stick to the recommended settings.
Upgrading the camshaft is the next step. This component controls the timing of the valves, allowing for better airflow and, ultimately, more power. Start by removing the valve cover, then swap out the stock camshaft for your performance upgrade. Align the timing marks correctly; this is crucial, as incorrect timing can lead to engine damage. After the camshaft is in place, reattach the valve cover and double-check all connections. If you’re going for maximum power, consider adding a high-compression piston. This works well with a big bore kit, increasing the engine’s power output by compressing the air-fuel mixture more tightly. The installation process is similar: remove the old piston and replace it with the new one, ensuring it’s positioned correctly.
Exhaust and Intake Installation
Now that the engine upgrades are in place, let’s focus on the exhaust and intake. An aftermarket exhaust system not only makes your Grom sound more aggressive but also improves airflow, which boosts performance. To begin, remove the old exhaust. You’ll need to loosen the bolts at the exhaust flange and the muffler bracket. Once it’s free, carefully slide out the stock exhaust system. Installing the new exhaust is straightforward. Make sure the gasket is in place before attaching the new exhaust, as this prevents leaks. Tighten the bolts securely, but don’t overtighten — you don’t want to damage the threads. Once installed, the new exhaust will immediately give your Grom a deeper, more satisfying growl.
Next, let’s upgrade the air intake. The stock air filter limits airflow, so swapping it for a high-flow filter or a cold air intake system can significantly improve engine performance. Remove the airbox and the stock filter, then fit in the new high-flow filter. Ensure that all clamps and connections are secure, as even a small gap can disrupt airflow and affect performance.
ECU Reflashing and Fuel Mapping
With the new engine parts and improved airflow, you need to adjust the ECU (Electronic Control Unit) to ensure your Grom runs smoothly. The ECU controls the fuel and air mixture, and tuning it will optimize the new upgrades. If you have an ECU reflashing tool, connect it to your bike’s diagnostic port. Download the latest tuning map that matches your modifications, such as a big bore kit or aftermarket exhaust. Follow the tool’s instructions carefully — this process usually takes just a few minutes. Once the reflash is complete, start the engine and let it idle for a bit so the ECU can adapt to the new settings.
Alternatively, you can use a Power Commander, a popular aftermarket device for tuning. Install the Power Commander under the seat, connecting it to the ECU harness. Use the software to adjust the fuel map. You can either choose a pre-configured map or create a custom one based on your upgrades. Take it slow with these adjustments; small changes can make a big difference in throttle response and overall performance.
Suspension Adjustments
Let’s start with the front forks. To upgrade the forks, you’ll need to remove the front wheel and carefully take out the fork tubes. Replace the stock springs with performance springs, which offer better damping and less bounce. Reinstall the forks and ensure they’re properly aligned with the front wheel. For the rear, swap out the stock shock with a high-performance option. This upgrade will give you better stability and reduce the impact of bumps on the road. Adjust the preload and damping settings according to your weight and riding style. It might take a few tries to get it just right, but you’ll feel the difference when you hit the road.
Testing and Fine-Tuning
After all the hard work, it’s time for a test ride. Start with a short ride around your neighborhood to get a feel for the changes. Pay close attention to how the bike accelerates, handles, and sounds. If the throttle feels jumpy or unresponsive, you might need to make minor adjustments to the fuel map or check for air leaks. During the ride, monitor the engine temperature as well. If it’s running hotter than usual, the fuel mixture could be too lean, which is risky for the engine. In this case, go back and adjust the ECU settings or add more fuel through the Power Commander.
Maintenance Tips for a Tuned Honda Grom
So, you’ve tuned your Honda Grom and it’s running better than ever. But here’s the thing, tuning isn’t a one-and-done job. To keep your Grom performing at its peak, you need to stay on top of regular maintenance. Don’t worry; I’ll keep it straightforward.
Regular Maintenance Routines to Keep Your Grom Running Smoothly
Start with the basics. After tuning, your Grom’s engine is working harder, so you’ll need to keep a closer eye on a few key areas:
- Oil Changes: Since a tuned engine often runs hotter and works harder, frequent oil changes are a must. I recommend changing the oil every 1,000-1,500 miles. Fresh oil keeps your engine lubricated and reduces wear and tear.
- Air Filter Check: A high-flow air filter is great for performance, but it also gets dirty faster. Check and clean your air filter every few weeks, especially if you ride in dusty or off-road environments. A clogged filter can choke your engine’s power.
- Chain Maintenance: Your bike’s chain needs regular attention, especially after tuning. Clean, lubricate, and adjust the chain every 500 miles to prevent slack and ensure smooth power delivery.
- Spark Plug Inspection: Tuning often puts more stress on your engine, so it’s a good idea to inspect your spark plugs regularly. Look for signs of fouling or wear, and replace them if necessary. A bad spark plug can make your bike run rough.
Monitoring Engine Health and Performance Metrics
Your tuned Grom might feel faster, but it’s important to monitor its health to avoid issues down the road. Here’s what I do:
- Temperature Monitoring: Keep an eye on engine temperature, especially after installing a big bore kit. If your Grom feels hotter than usual, it might be running lean (not enough fuel), which can damage the engine. Consider using a temperature gauge or sensor for accurate readings.
- Fuel Efficiency: Track your fuel efficiency before and after tuning. A sudden drop in mileage can indicate issues like poor tuning or fuel system problems. This is a simple way to spot potential issues early.
- Listen to Your Engine: Pay attention to unusual sounds like knocking, pinging, or ticking. These can be early warning signs of issues with the fuel-air mixture or valve timing. If something sounds off, don’t ignore it — it’s better to check now than face costly repairs later.
Troubleshooting Common Issues After Tuning
No tuning job is perfect on the first try, and that’s okay. Here’s how to handle some common post-tuning problems:
- Engine Running Lean or Rich: If your engine runs lean (too little fuel), it may overheat or feel sluggish. Running rich (too much fuel) can cause black smoke or foul spark plugs. Adjust your ECU settings or fuel controller to get the balance right.
- Check Engine Light: This can pop up after tuning if there’s a sensor issue. A quick diagnostic scan can tell you what’s wrong. Often, it’s a simple fix, like an oxygen sensor needing adjustment.
- Throttle Response Issues: If your throttle feels jerky or sluggish, it might be a problem with the fuel mapping. Try fine-tuning the settings on your Power Commander or ECU for smoother throttle control.
Legal and Environmental Considerations
Tuning your Honda Grom is all about making it perform better, but it’s important to do it legally and responsibly. Here’s what you need to know:
Understanding Local Regulations on Motorcycle Modifications
Before you start making big changes, check your local laws. Some states and countries have strict rules about motorcycle modifications, especially when it comes to emissions and noise levels. For example:
- Noise Limits: Loud exhaust systems are fun, but many places have noise ordinances. If your exhaust is too loud, you could get ticketed or fail inspection. Consider installing a baffle or dB killer to reduce noise if needed.
- Emission Standards: Removing or modifying emissions components, like the catalytic converter, might make your bike perform better, but it can also be illegal. Most states require motorcycles to meet certain emission standards, so be sure your modifications are compliant.
Staying Compliant with Emissions and Noise Levels
The key here is to strike a balance. You want performance, but you also need to keep your bike street-legal. Here are a few tips:
- Keep Your Stock Parts: If you’re not sure about the legality of a modification, hold onto your stock parts. This way, you can easily swap them back if you need to pass an inspection.
- Consult Local Regulations: Check with your local Department of Motor Vehicles (DMV) or similar agency to get the most up-to-date rules. It’s better to spend a few minutes researching than dealing with fines or legal issues later.
Resources and Further Reading
If you’re as passionate about Honda Grom tuning as I am, there’s a whole community out there waiting to share tips, tricks, and stories. Here are some of my go-to resources:
Forums and Communities
- GromForum.com: A great place to ask questions, share your tuning experiences, and learn from other Honda Grom enthusiasts.
- Reddit’s r/HondaGrom: This subreddit is packed with helpful posts, DIY guides, and discussions about tuning and modifications.
- GromRiders Facebook Group: Join this group to connect with fellow riders, see photos of their builds, and get advice on specific parts and upgrades.
Expert Articles and Guides
- TST Industries Blog: They offer in-depth articles on Grom upgrades, including exhaust comparisons and ECU tuning tips.
- RevZilla Guides: Comprehensive guides on motorcycle parts and accessories, often featuring reviews on popular Honda Grom mods.
Recommended Books
- “The Complete Motorcycle Manual” by Cycle World: A must-have for any motorcycle enthusiast looking to dive deeper into tuning and maintenance.
- “Sportbike Performance Handbook” by Kevin Cameron: Although it covers all sportbikes, the tuning principles apply well to the Honda Grom.
Conclusion
Tuning your Honda Grom isn’t just about making it faster; it’s about customizing the ride to fit your style and needs. From engine upgrades to fine-tuning the suspension, every mod adds a unique touch to your bike. Remember, the goal is to enhance performance while keeping your Grom reliable and street-legal. With a bit of planning, patience, and the right resources, you can transform your Honda Grom into a true powerhouse that stands out on the road. Just remember to respect local regulations and keep up with regular maintenance — your bike (and your wallet) will thank you later.
FAQs – Honda Grom Tuning
What’s the first mod I should do to my Grom?
I recommend starting with an exhaust upgrade. It’s easy, affordable, and gives you noticeable results right away.
Will tuning affect my Grom’s warranty?
It might, depending on the mod and your dealer. Check your warranty terms before making any major changes.
How much does it cost to fully tune a Honda Grom?
It can range from a few hundred dollars for basic mods to over $1,500 for a complete performance overhaul.

