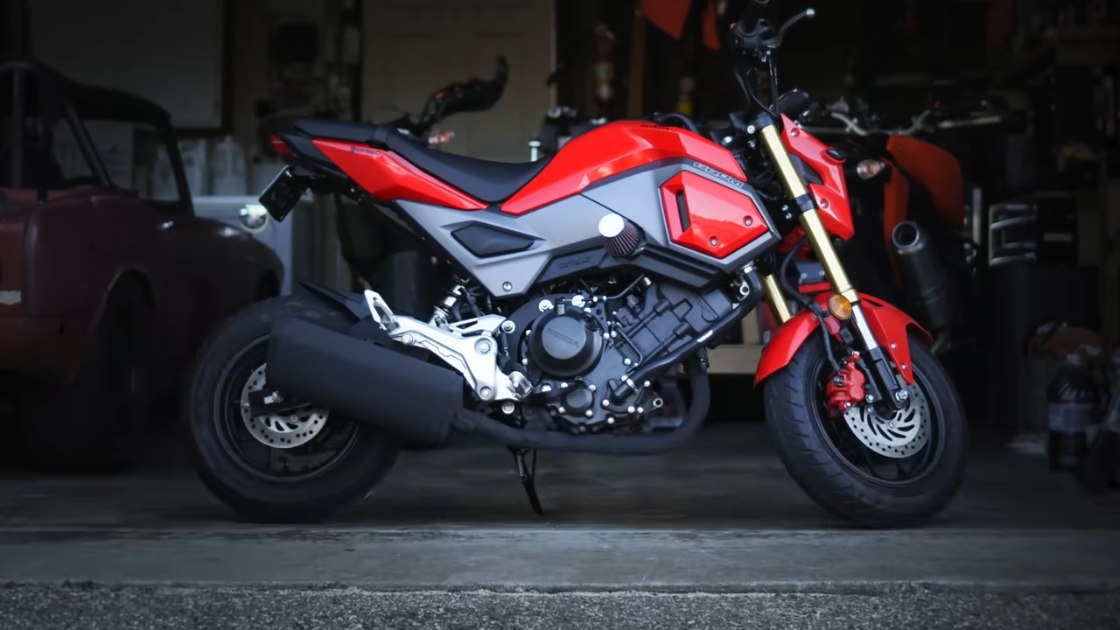
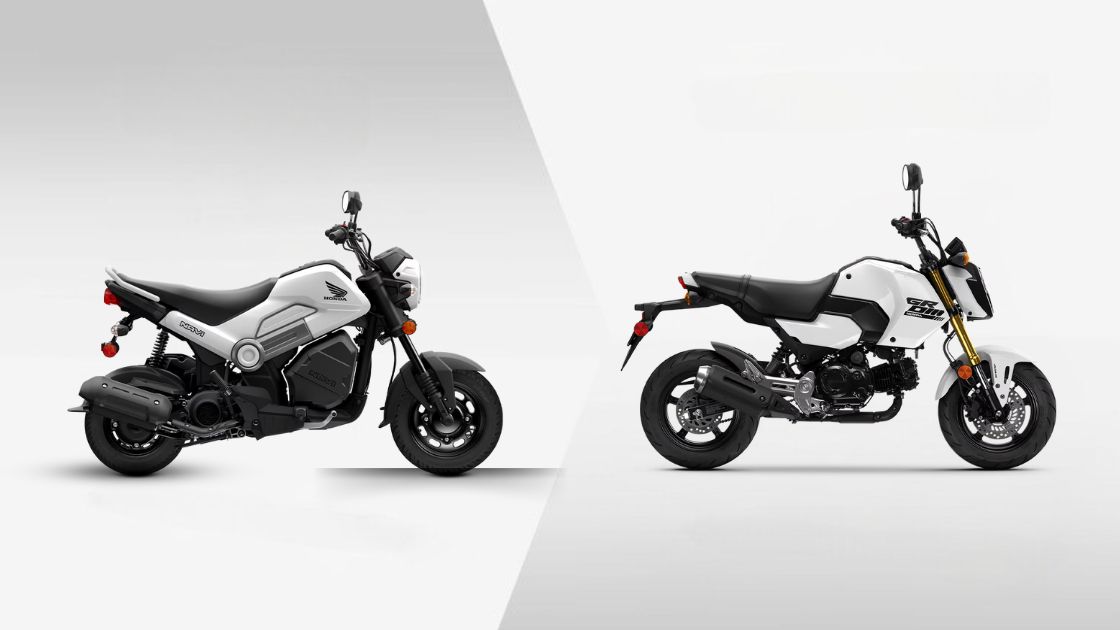
If you own a Honda Grom, you already know it’s a fun little bike that’s perfect for city cruising and weekend rides. But let’s be real—sometimes you want just a bit more power to take it to the next level. That’s where a Honda Grom engine swap comes in. Swapping out the stock engine for something bigger can give your Grom a serious boost in speed and performance, making it a whole new ride. In this guide, I’m here to show you how it’s done, from picking the right engine to fine-tuning your new setup. Whether you’re looking to squeeze out more horsepower or just want to take on a fun project, this is your complete roadmap to transforming your Grom into a mini street monster.
Table of Contents
ToggleWhy Consider an Engine Swap for Your Honda Grom?
Swapping the engine on a Honda Grom is a big project, but it can completely transform the bike’s performance and make it uniquely yours. The main appeal of an engine swap is the significant power boost. The stock 125cc engine is fine for casual riding, but if you crave more speed, upgrading to a CBR250 or CBR300 engine can drastically increase your horsepower and torque, letting you hit speeds of 80 mph or more with ease. Beyond power, it’s also a chance for serious customization. Whether you want a high-revving engine for off-road adventures or something smoother for highway cruising, an engine swap allows you to tailor the Grom to your personal riding style. You’ll notice enhanced performance too, with better throttle response, quicker acceleration, and a more engaging riding experience overall. However, this isn’t a beginner-level mod—it requires mechanical know-how and a good understanding of how the bike works. If you’re new to engine swaps, consider teaming up with a more experienced friend or consulting a professional. While challenging, the project is incredibly rewarding, giving you a custom-built Grom that’s more powerful, responsive, and fun to ride.
Popular Engine Options for Honda Grom Swaps
Choosing the right engine for your Honda Grom swap is one of the most important decisions you’ll make in this process. The good news is that there are several great options out there, each with its own strengths and weaknesses. Let’s take a look at some of the most popular engine swaps for the Honda Grom and what makes each of them unique.
CBR250/CBR300 Engine Swap
The Honda CBR250 and CBR300 engines are some of the most common choices for Grom engine swaps, and it’s easy to see why. These engines offer a significant power boost without adding too much weight, making them an excellent upgrade for street riders who want more speed and better acceleration.
- Pros:
- Noticeable increase in horsepower and torque, making your Grom faster and more responsive.
- Reliable and well-tested engines from Honda, known for their durability.
- Plenty of aftermarket support, including mount kits and wiring harness adapters.
- Cons:
- Requires custom engine mounts and some modifications to the frame.
- More complex wiring and ECU adjustments needed for proper performance.
- May require an upgraded cooling system to handle the extra heat.
The CBR250/300 engines are a great choice if you’re looking for a balanced upgrade that provides both speed and reliability. They’re also relatively easy to find, thanks to their popularity in the motorcycle market.
CRF150R Engine Swap
For those who want something a bit different, the CRF150R engine is another fantastic option. This engine is designed for motocross bikes, so it’s lightweight, high-revving, and packs a surprising amount of power for its size.
- Pros:
- High-revving engine with great throttle response, perfect for aggressive riders.
- Lightweight, which helps maintain the nimble feel of the Grom.
- Ideal for riders who enjoy off-road trails or a more spirited riding style.
- Cons:
- Lower torque compared to the CBR engines, which may not be ideal for highway use.
- More frequent maintenance required, especially if ridden hard.
- Limited availability, which can make finding a good donor engine challenging.
The CRF150R engine is best suited for riders who enjoy a playful, high-revving bike that’s great for off-road fun. It’s not the best choice if you’re looking for a smooth, powerful ride on the highway, but it shines on dirt trails and twisty backroads.
KTM EXC 300 Engine Swap
If you’re looking for raw power and aren’t afraid of a challenge, the KTM EXC 300 engine might be the swap for you. This engine offers a huge boost in performance, turning your Honda Grom into a mini monster on wheels. However, it’s not for the faint of heart, as it requires significant modifications.
- Pros:
- Massive power increase, making your Grom capable of incredible speed and acceleration.
- Two-stroke engine with a distinct, aggressive power delivery that’s a blast to ride.
- Ideal for experienced riders looking for a high-performance build.
- Cons:
- Extensive modifications needed to fit the engine, including custom mounts and frame adjustments.
- More challenging to tune and maintain, especially for beginners.
- Higher cost, both for the engine and the required upgrades.
The KTM EXC 300 swap is perfect for thrill-seekers who want the ultimate performance upgrade. It’s a more complex swap that requires a lot of work, but the payoff is a bike that can outrun almost anything in its class.
Required Components and Kits
Swapping the engine in your Honda Grom isn’t as simple as just dropping in a new motor. To make everything fit and function properly, you’ll need a variety of components, kits, and tools. Gathering everything ahead of time will save you headaches down the road and ensure the process goes as smoothly as possible. Let’s break down the key parts you’ll need for a successful engine swap.
Engine Mount Kits
The first thing you’ll need is an engine mount kit. This kit is essential because the new engine will not fit directly into the Grom’s stock frame without modifications. Engine mount kits are designed to securely hold the new engine in place and ensure proper alignment.
- Popular Options:
- Chimera Engineering Mount Kits: Known for their quality and fitment, these kits are a popular choice for CBR250/300 swaps.
- WERKD GROMS Kits: Offers a range of options tailored for different engine swaps, including custom mounts for KTM engines.
Cooling System Upgrades
Larger engines generate more heat, which means you’ll need an upgraded cooling system to prevent overheating. The stock radiator on a Honda Grom is not designed to handle the increased heat output of a bigger engine.
- Radiators: A larger, front-mounted radiator will provide better cooling capacity. Look for options with high-quality aluminum construction for durability.
- Cooling Hoses: You may need longer or differently shaped hoses to connect the new radiator to the engine.
- Fans: Installing a cooling fan can help keep temperatures down, especially in stop-and-go traffic or hot weather.
Wiring Harness and Electrical Components
The electrical system of your Grom will need to be modified to accommodate the new engine. This typically involves changes to the wiring harness, as well as possible upgrades to the ECU.
- Wiring Harness: You may need a custom wiring harness or adapt your existing one. Kits like the aRacer wiring harness make it easier to connect everything without extensive rewiring.
- ECU (Engine Control Unit): The stock ECU may not be able to handle the new engine’s parameters. Consider upgrading to an aftermarket ECU like the aRacer ECU kit, which allows for custom tuning and better fuel management.
- Battery and Charging System: A bigger engine may require more power, so check if your stock battery can handle the load. Upgrading to a high-capacity battery might be necessary.
Intake and Exhaust Systems
To get the most out of your engine swap, you’ll need to optimize the intake and exhaust systems. These components are crucial for proper airflow, which directly impacts performance.
- Intake Systems: A larger engine requires more air. Consider installing a high-flow air filter or a custom intake system to improve airflow.
- Exhaust Systems: The stock exhaust on the Grom may be too restrictive for a bigger engine. An aftermarket exhaust, designed for increased flow, will help your engine breathe better and produce more power. You may need to fabricate or modify the exhaust to fit properly.
Gearing and Chain Upgrades
With a more powerful engine, you’ll likely need to change the gearing to match the new power output. The stock chain and sprockets may not be strong enough to handle the increased torque.
- Sprockets: Consider upgrading to stronger, aftermarket sprockets. Adjusting the size of the front and rear sprockets can also help fine-tune your bike’s performance for either acceleration or top speed.
- Heavy-Duty Chain: A reinforced chain is essential to handle the added stress of a bigger engine. Look for chains rated for higher horsepower applications.
Additional Parts and Accessories
Depending on your chosen engine and swap complexity, there may be a few additional parts you need:
- Motorcycle Stand: A sturdy stand is essential for holding your bike securely during the swap.
- Torque Wrench: Accurate torque settings are critical for securing bolts properly.
- Sealant and Gaskets: It’s a good idea to replace any old gaskets and use sealant where needed to prevent leaks.
Step-by-Step Engine Swap Process
If you’ve gathered all your parts and are ready to dive into the engine swap, congratulations! You’re about to start one of the most rewarding projects you can do on a Honda Grom. The process might seem intimidating, especially if it’s your first time doing an engine swap, but don’t worry—I’m going to guide you through each step. Just take your time, be patient, and follow this detailed step-by-step guide.
Step 1: Preparation
Before you start wrenching, preparation is key. Here’s what you need to do to get ready:
- Set Up Your Workspace: Make sure you have a clean, well-lit area to work in. Ideally, you’ll want a motorcycle stand to keep your Grom secure and lifted off the ground.
- Gather Tools: You’ll need basic hand tools like sockets, wrenches, screwdrivers, and pliers. A torque wrench, engine hoist (if available), and specialty tools for wiring might also come in handy.
- Safety First: Wear safety glasses and gloves to protect yourself from injuries. Keep a fire extinguisher nearby, especially if you’re working with electrical components or fuel lines.
Step 2: Removing the Stock Engine
This is where the real work begins. Removing the stock engine involves disconnecting several components, so take your time and make sure you label everything if needed.
- Disconnect the Battery: Start by disconnecting the negative terminal of the battery. This will prevent any electrical shorts while you’re working on the bike.
- Drain the Fluids: Remove the oil drain plug and let the engine oil drain completely. Next, drain the coolant from the radiator by opening the drain bolt.
- Remove the Exhaust System: Unbolt the exhaust header and muffler. Be careful not to damage the gasket if you plan to reuse it.
- Disconnect Wiring and Cables: Unplug all electrical connectors attached to the engine, including the ignition coil, throttle cables, and any sensors. Carefully label the wires if you’re not sure where they go.
- Detach the Fuel Line: Disconnect the fuel line from the carburetor or fuel injector, depending on your model. Be prepared for a small amount of fuel to spill out, so have a rag handy.
- Unbolt the Engine Mounts: Finally, use a socket wrench to remove the engine mount bolts. Once all bolts are removed, carefully lower the engine out of the frame. You may need an extra set of hands to help with this part.
Step 3: Installing the New Engine
With the stock engine removed, it’s time to fit in the new engine. This step will vary slightly depending on the engine you’ve chosen, but the general process is similar.
- Test Fit the Engine: Before bolting it in place, do a dry fit to make sure the new engine fits properly. Check for any clearance issues or parts that may need adjusting.
- Install Engine Mount Kit: If you’re using an aftermarket engine mount kit, install the mounts according to the manufacturer’s instructions. Make sure they’re tightened securely to prevent movement during riding.
- Bolt the Engine in Place: Align the engine with the mounts and insert the bolts. Tighten them with a torque wrench to the specified torque settings in your service manual.
- Reconnect Wiring and Cables: Reconnect all electrical components, making sure each wire is securely plugged in. Double-check your work to avoid any issues later.
- Install the Cooling System: Attach the radiator and connect the coolant hoses. Fill the radiator with coolant and ensure there are no leaks.
- Reattach the Exhaust System: Install the new or modified exhaust system. Make sure it’s properly sealed to prevent any exhaust leaks.
Step 4: Post-Installation Checks
Before you fire up the engine for the first time, it’s important to go through a series of checks to ensure everything is installed correctly.
- Check All Bolts and Fasteners: Go over every bolt and make sure they’re tightened to the correct torque. A loose engine mount can cause serious damage.
- Inspect the Wiring: Look over the wiring harness for any loose or disconnected plugs.
- Verify Fluid Levels: Check the oil and coolant levels and top them off if needed.
Step 5: First Start and Test Ride
The moment of truth has arrived—it’s time to start the engine for the first time.
- Prime the Engine: Turn the ignition on and let the fuel pump prime the engine (if applicable). This helps ensure the fuel system is pressurized.
- Start the Engine: Press the starter button and listen carefully as the engine starts. Pay attention to any unusual noises, such as knocking or rattling.
- Check for Leaks: With the engine running, inspect the bike for any leaks (oil, fuel, or coolant). If you spot any, shut off the engine and fix the issue before continuing.
- Take It for a Slow Test Ride: Once you’ve confirmed there are no leaks, take the bike for a gentle test ride. Start slow and listen for any odd sounds or issues. Pay attention to how the bike handles and brakes.
Step 6: Fine-Tuning and Adjustments
After your test ride, you might need to make a few adjustments to get everything dialed in perfectly.
- Adjust the ECU Settings: If you’re using an aftermarket ECU, spend some time tuning it for optimal performance. This can make a big difference in how the bike feels.
- Check the Suspension: With a heavier or more powerful engine, you might need to adjust the suspension settings for better handling.
- Revisit the Gearing: If the new engine feels too sluggish or revs too high, consider changing the sprocket sizes to find the right balance.
Electrical and ECU Considerations
Handling the electrical system and ECU during an engine swap is just as important as the mechanical work. The new engine may have different requirements, so let’s go over what you need to update and adjust for a successful swap.
Wiring Harness Modifications
Your Honda Grom’s stock wiring harness might not be compatible with the new engine’s sensors and connectors. You have two main options: modify the existing harness or use an aftermarket custom harness.
Modifying the stock harness can be time-consuming, but it’s often cheaper. Carefully label each wire and use heat shrink tubing to cover exposed connections. If you’re not confident in your wiring skills, a custom harness made for specific engine swaps (like the CBR250 or CBR300) can make the process easier and reduce the risk of electrical problems.
Upgrading the ECU
The Engine Control Unit (ECU) is the brain of your bike, managing fuel injection, ignition timing, and overall engine performance. When you swap in a different engine, the stock ECU might not be able to handle the new parameters, so upgrading is often necessary.
An aftermarket ECU, like the aRacer or Power Commander, offers greater control and customization. This type of ECU can be tuned to match the new engine’s characteristics, ensuring you get the best performance. If you’re not experienced with ECU tuning, consider having your bike professionally tuned on a dyno.
Electrical System Upgrades
Swapping the engine might also require updates to other electrical components, such as the battery, starter, and fuel system.
The stock battery on the Grom may not provide enough power for a larger engine, so upgrading to a higher-capacity battery can prevent starting issues. Additionally, check the compatibility of the starter motor and charging system. For fuel-injected engines, verify that the fuel pump can supply enough fuel for the increased demand.
Testing and Troubleshooting
After making all the necessary electrical changes, thoroughly test the system before hitting the road. Start the bike and check all electrical components, including lights, indicators, and the starter. Look for any signs of wiring issues, like flickering lights or weak starts, and address these problems before your first ride.
Performance Enhancements and Tuning
After completing your engine swap, the fun part begins—unlocking the full potential of your new setup. Tuning and additional performance upgrades can make a big difference in how your Honda Grom handles and feels. Let’s look at the key enhancements to consider.
ECU Tuning
The ECU (Engine Control Unit) controls critical aspects of the engine’s performance, such as fuel injection and ignition timing. With a new engine, the stock ECU settings won’t cut it. Upgrading to an aftermarket ECU like aRacer or Power Commander allows you to fine-tune the engine’s parameters.
- Why Tune the ECU? Tuning adjusts the air-fuel mixture and ignition timing to match your new engine’s needs. This results in smoother throttle response, better fuel efficiency, and increased power.
- Professional vs. DIY Tuning: If you’re familiar with tuning software, you can make adjustments yourself. However, a professional dyno tune is recommended for optimal results. A dyno tuner can create a custom map tailored to your engine setup, maximizing performance.
Upgrading the Exhaust System
The exhaust system plays a crucial role in how your bike performs. With a bigger engine, the stock exhaust can become restrictive, limiting airflow and power output. Switching to an aftermarket exhaust designed for higher performance will help your engine breathe better.
- Improved Airflow: A freer-flowing exhaust reduces backpressure, allowing the engine to expel gases more efficiently. This can increase horsepower and give your bike a deeper, more aggressive sound.
- Custom Fit: Depending on your engine swap, you may need a custom exhaust to fit properly. Be sure to check for exhaust leaks and secure all connections tightly.
Enhancing the Intake System
Upgrading the intake system is another way to boost performance. A larger engine requires more air, so consider installing a high-flow air filter or a custom intake setup.
- High-Flow Air Filters: These filters allow more air to reach the engine, improving combustion. Brands like K&N offer reliable options that fit most setups.
- Cold Air Intake: A cold air intake system can draw in cooler, denser air, which improves engine efficiency and power.
Gearing Adjustments
With the added power of a new engine, you might notice that your Grom’s gearing feels off. Adjusting the sprocket sizes can help you find the right balance between acceleration and top speed.
- Lower Gearing (Smaller Front Sprocket): This setup increases acceleration but reduces top speed. It’s ideal if you prefer quick launches and aggressive riding.
- Higher Gearing (Larger Front Sprocket): This setup reduces acceleration but increases top speed. It’s better for highway cruising and longer rides.
Suspension and Brake Upgrades
A more powerful engine puts additional stress on your bike’s suspension and brakes. Upgrading these components ensures your Grom can handle the increased speed and weight safely.
- Suspension: Consider upgrading to stiffer springs or a better shock absorber for improved handling. This will help keep the bike stable during hard acceleration and braking.
- Brakes: Enhanced stopping power is a must with a faster bike. Upgrade to larger brake discs or better-quality brake pads for improved braking performance.
Testing and Refining
Once you’ve made these performance upgrades, take your Grom for a test ride and pay close attention to how it handles. You may need to fine-tune the ECU settings or make additional adjustments to the suspension and gearing.
Legal and Insurance Implications
Before hitting the road with your modified Honda Grom, be aware of the legal and insurance considerations. An engine swap can affect the bike’s compliance with local regulations. In many regions, modifying the engine can lead to issues with emissions standards, as larger engines typically produce more emissions. You may need to install additional components, like a catalytic converter, to meet legal requirements. Additionally, loud exhaust systems could violate local noise regulations, so check the rules in your area to avoid fines.
From an insurance standpoint, it’s crucial to notify your provider about the engine swap. Standard motorcycle insurance may not cover significant modifications, and failing to disclose the changes could void your coverage. Be prepared for higher premiums, as a more powerful engine increases risk factors. Consider looking into custom motorcycle insurance policies, which often provide better protection for modified bikes and aftermarket parts.
Lastly, prioritize safety. Make sure all modifications are secure and reliable. Regular maintenance is key, especially after an engine swap, to ensure that critical components like the brakes and suspension can handle the new power. By addressing legal, insurance, and safety considerations upfront, you’ll be able to enjoy your upgraded Grom with peace of mind.
Maintenance and Reliability
Swapping the engine on your Honda Grom means you’ll need to rethink your regular maintenance routine. A more powerful engine brings new challenges, so let’s cover what to watch out for and how to keep your bike in top shape.
Regular Maintenance
With a modified engine, the usual maintenance schedule needs adjusting. Check and change the oil more frequently—every 1,000 to 1,500 miles is a good rule of thumb, especially if you ride hard. High-performance engines run hotter and put more stress on oil, so using quality synthetic oil is a must. Coolant checks are crucial too. A bigger engine produces more heat, so inspect the coolant level regularly. If you see it dropping quickly, look for leaks around the hoses and radiator.
Wear points like engine mounts and exhaust bolts need checking often. The added vibrations from a larger engine can loosen these parts over time. Tighten them as needed and keep an eye on the wiring to avoid electrical problems.
Reliability Concerns
Engine swaps can lead to unexpected issues, especially if parts aren’t perfectly matched. Common problems include overheating, electrical faults, and poor fuel efficiency. Keeping the ECU properly tuned can prevent many of these headaches. Regular adjustments ensure the engine runs smoothly and avoids stress on other components. The Grom community is a great resource for troubleshooting. Many riders share their long-term experiences with different engine swaps, providing valuable feedback on what to expect. Learn from their advice to avoid common pitfalls and make your Grom as reliable as possible.
Cost Analysis
Swapping the engine on your Honda Grom can be a thrilling project, but it’s important to know the costs involved before diving in. Let’s break down the typical expenses and what you should budget for.
Engine and Parts
The biggest expense is the engine itself. A used CBR250 or CBR300 engine typically costs between $500 and $1,500, depending on the condition and mileage. If you’re opting for a high-performance engine like the KTM EXC 300, expect to pay upwards of $2,000. Donor engines can sometimes be found cheaper through salvage yards or online forums, but make sure to inspect them for wear and damage. Engine mount kits range from $200 to $500, depending on the brand and compatibility with your chosen engine. You’ll also need a new radiator, which can cost around $150 to $300, especially if you’re upgrading to a larger or performance model. Additional components like intake and exhaust systems might set you back another $300 to $700.
Electrical and ECU
Upgrading the wiring harness and ECU is often necessary, especially if you’re switching to a different engine model. A custom wiring harness can cost between $150 and $400. An aftermarket ECU, like the aRacer, typically runs from $400 to $700, but it’s worth the investment for precise tuning and better engine control.
Labor vs. DIY
If you have the skills and tools, doing the swap yourself can save a significant amount of money. However, if you’re not comfortable with mechanical work, hiring a professional mechanic is a good idea. Labor costs for an engine swap usually range from $500 to $1,500, depending on the complexity of the job and local shop rates.
Total Estimated Costs
- Donor Engine: $500 – $2,000
- Mount Kit and Radiator: $350 – $800
- Exhaust and Intake Upgrades: $300 – $700
- Wiring and ECU: $550 – $1,100
- Labor (if needed): $500 – $1,500
In total, you’re looking at an estimated cost of $2,200 to $6,000, depending on your engine choice and whether you do the work yourself or hire a professional.
Community Resources and Support
The Honda Grom engine swap project is a big undertaking, but you’re not alone in this journey. The Grom community is large, active, and filled with experienced riders who have tackled similar projects. Whether you need help troubleshooting, advice on parts, or just want to show off your build, the Grom community is a great place to start. Let’s explore some of the best resources and support options available.
Online Forums and Groups
One of the best places to find detailed information and support is through online forums and social media groups. Websites like HondaGrom.net and Grom forums on Reddit are packed with build threads, tutorials, and discussions about engine swaps. These forums are gold mines for tips and tricks from riders who have already completed similar swaps. If you run into a problem during your build, there’s a good chance someone else has faced the same issue and can offer advice.
YouTube Tutorials and Build Videos
If you’re a visual learner, YouTube is an excellent resource for step-by-step tutorials and build videos. Many riders document their engine swap projects, providing a detailed look at the entire process, from engine removal to wiring modifications. Watching these videos can help you avoid common pitfalls and give you a better understanding of the work involved. Channels focused on motorcycle modifications or specific Grom projects are especially helpful.
Local Motorcycle Meetups
Don’t underestimate the value of connecting with other motorcycle enthusiasts in person. Local bike meetups and motorcycle events are great places to find experienced riders who can offer hands-on help or advice. Many communities have Grom-specific meetups or small-bike gatherings where you can share your build progress, get feedback, and learn from others. These events are also great opportunities to test out different setups and get ideas for future upgrades.
Professional Shops and Tuners
While DIY projects are rewarding, there’s no shame in reaching out for professional help when needed. Specialized motorcycle shops and tuners have the tools and expertise to handle complex tasks like ECU tuning or custom wiring. If you’re stuck or want to ensure everything is set up perfectly, a professional tuner can help you get the most out of your engine swap. It’s an extra cost, but it can save you time and potential headaches down the road.
Sharing Your Build
Once your engine swap is complete, consider sharing your experience with the community. Posting your build process, photos, and any lessons learned can help other riders who are starting their own projects. It’s a great way to give back and become part of the Grom modding culture. Plus, you’ll get to show off your hard work and inspire others to take on their own custom builds.
Conclusion
Swapping the engine on your Honda Grom is no small feat, but it’s one of the most exciting projects you can take on as a motorcycle enthusiast. From the initial planning and parts gathering to the satisfying roar of a test ride with your new engine, the entire process is a rewarding journey that transforms your Grom into a unique, high-performance machine. Throughout this guide, we’ve covered everything you need to know—from choosing the right engine and sourcing essential components to understanding the legal and insurance implications, tuning for peak performance, and staying on top of maintenance. By following these steps and tapping into the support of the Grom community, you can confidently tackle this project and avoid many of the common pitfalls that others have faced.
An engine swap isn’t just about making your bike faster; it’s about creating something truly personal. Every decision, every part, and every tweak you make reflects your own style and riding preferences. In the end, you’re left with a custom-built Grom that’s tailored to how you want to ride. Remember, patience and attention to detail are key. Take your time, double-check your work, and don’t hesitate to reach out for help if you get stuck. The thrill of riding a Grom with a fresh, powerful engine that you installed yourself is well worth the effort.
Disclaimer
The information provided in this blog is intended for educational and entertainment purposes only. Performing a Honda Grom engine swap involves significant modifications that require mechanical skills, specialized tools, and an understanding of motorcycle components. Attempting this project without proper knowledge or experience may result in damage to your bike or personal injury. Always follow safety guidelines and consult your motorcycle’s service manual. Be aware that engine swaps may impact your bike’s legality on public roads and could affect your insurance coverage. Check with local authorities for regulations regarding emissions, noise levels, and registration before proceeding. We strongly recommend consulting a professional mechanic if you are unsure about any part of the process. The author and website assume no responsibility for any damages or legal issues arising from modifications made based on this guide.
FAQs
What engines are compatible with a Honda Grom?
Popular choices include the Honda CBR250R and CBR300R engines, known for their compatibility and performance enhancements.
How much does an engine swap cost for a Honda Grom?
Costs vary based on engine choice, parts, and labor, typically ranging from $2,200 to $6,000.
Is an engine swap legal on a Honda Grom?
Legality depends on local regulations, especially concerning emissions and safety standards. Consult local authorities to ensure compliance.
Do I need to upgrade other components after an engine swap?
Upgrading brakes, suspension, and cooling systems is advisable to handle increased power and maintain safety.
Will an engine swap affect my insurance?
Yes, modifications can impact insurance coverage and premiums. Inform your insurer about any changes to maintain proper coverage.
Can I perform the engine swap myself?
If you have mechanical experience and the necessary tools, a DIY swap is feasible. However, professional assistance is recommended for those less experienced.

