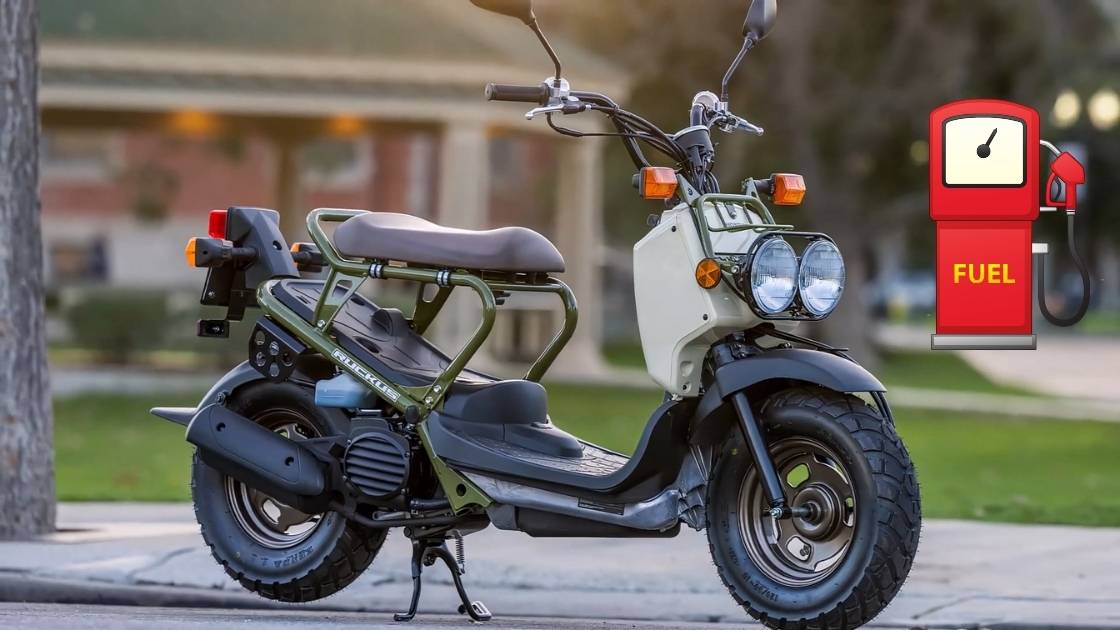

Your Honda Ruckus depends on a small but essential part: its battery. Without it, the scooter cannot start, the lights stay dim, and the ride you rely on every day becomes impossible. Most Ruckus scooters use a compact 12-volt battery, often the Yuasa YTZ7S or an equivalent model. Like any battery, it wears out with time, frequent use, or long periods of storage without charging.
Replacing it is a straightforward process that you can handle on your own. You do not need advanced mechanical skills or expensive tools. What you need is the right replacement battery, a screwdriver, and a clear set of steps to follow. By learning how to change it yourself, you save both time and repair costs. More importantly, you gain confidence in maintaining your own scooter.
This guide shows you how to identify when your battery is failing, which model fits the Ruckus correctly, and how to install it safely. Every step is explained in order, with practical tips to avoid mistakes and keep your scooter reliable. After finishing, you will have a fresh battery in place and a clear understanding of how to keep it working longer.
Table of Contents
ToggleSigns Your Honda Ruckus Battery Needs Replacement
A weak battery shows itself through clear symptoms you can recognize early. The most common sign is difficulty starting the scooter. You may notice the starter motor turning slowly or failing to turn at all.
Dim headlights are another indicator. When the battery cannot hold a charge, the lights lose brightness even when the engine is running. This problem often becomes worse at night when visibility is most important.
Frequent stalling can also point to a failing battery. If the scooter stops running after short trips or loses power while idling, the battery may not deliver steady voltage.
You should also check for a battery that drains too quickly after charging. A healthy unit keeps its charge for days, while a failing one loses power in a short time. This is especially noticeable if the scooter sits unused for only a few days and will not start.
Physical damage gives you another warning sign. Look for swelling on the casing, leaking fluid, or corroded terminals. These are clear signals that the battery is no longer safe or reliable.
If you notice any of these issues, it is time to prepare for a replacement. Acting quickly prevents further electrical problems and ensures your Ruckus stays dependable.
Tools and Parts You’ll Need
You need only a few items to replace the battery on your Honda Ruckus. Each one has a specific role in the process.
Start with a Phillips screwdriver. You will use it to remove the screws that secure the battery cover.
Keep a socket wrench set available. Some Ruckus models require it to loosen bolts that hold the battery in place.
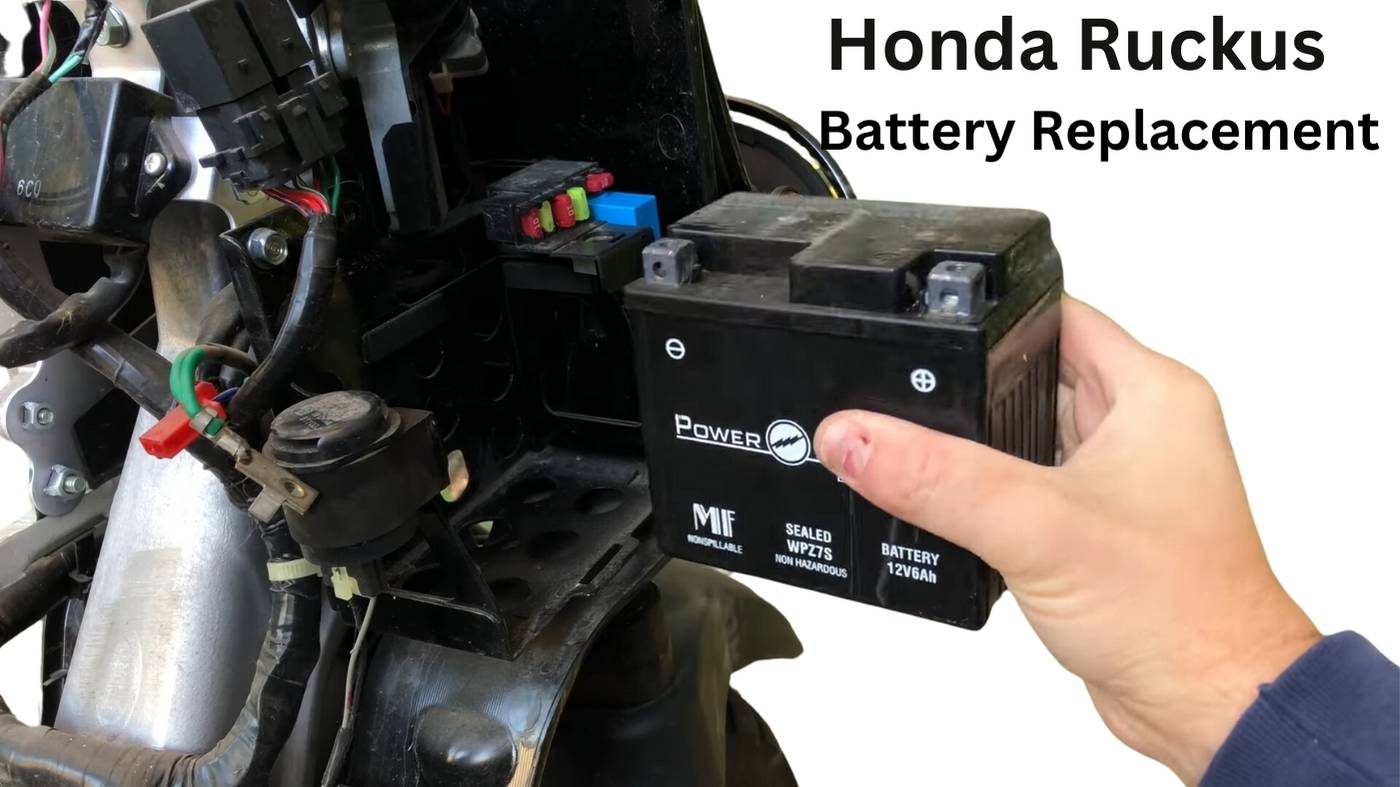
Use a new replacement battery that matches the correct specifications. The standard model is a Yuasa YTZ7S 12-volt AGM, but you can also choose an equivalent battery from other reliable brands.
Have a pair of protective gloves ready. Gloves protect your hands from dirt, sharp edges, or accidental contact with terminals.
Keep a small brush or cloth nearby. You can use it to clean the battery tray and remove any corrosion before installing the new unit.
Step-by-Step Guide: How to Replace the Battery
Begin by parking your Honda Ruckus on a flat surface. Switch the ignition to the off position and remove the key. This step ensures there is no electrical flow while you work.
Locate the battery compartment. On the Ruckus, the battery sits beneath the front panel below the seat. Use your Phillips screwdriver to remove the screws holding the cover in place. Keep the screws in a safe spot so you do not lose them.
Disconnect the cables in the correct order. Always remove the negative cable first to prevent sparks or short circuits. After disconnecting the negative, detach the positive cable. Pull the cables gently to avoid damaging the connectors.
Lift the old battery out of the tray. Use both hands to keep it steady, since it may be heavier than expected. Set it aside in an upright position to prevent any leakage.
Place the new battery into the tray with the terminals facing the correct direction. Confirm that it sits flat and secure inside the compartment. A loose fit can cause vibrations and connection issues.
Reconnect the cables in reverse order. Start with the positive cable, then attach the negative cable. Tighten the screws carefully so the connections stay firm without overstripping the threads.
Reinstall the battery cover. Replace the screws with your screwdriver and make sure the panel is firmly secured. This protects the battery from movement and exposure while riding.
Once the cover is in place, turn on the ignition to check the lights and starter. If everything powers up correctly, the installation is complete.
Choosing the Right Replacement Battery
You must select a battery that matches the factory specifications of the Honda Ruckus. The original equipment model is the Yuasa YTZ7S, which is a sealed 12-volt AGM battery. This type is compact, maintenance-free, and designed to handle the vibration and demands of daily riding.
Several brands produce reliable equivalents that fit the Ruckus. Options include BikeMaster BTZ7S, Mighty Max YTZ7S, and Shorai LFX07L2 for riders who prefer a lightweight lithium alternative. Always confirm the dimensions, voltage, and terminal orientation before making a purchase.
You should also check the cold cranking amps (CCA). A rating of at least 130 CCA ensures the battery delivers enough starting power in different weather conditions. A lower rating can lead to weak starts, especially in colder climates.
Choose a supplier with good quality control and clear warranty terms. Reputable online retailers and motorcycle parts stores often provide return policies and technical support. Avoid unbranded or undersized models, since these can fail quickly and create more costs over time.
When you install a battery that meets the correct size, voltage, and performance standards, you ensure your Ruckus runs dependably and starts on demand.
Safety Tips and Common Mistakes to Avoid
Always disconnect the negative cable before the positive cable. This prevents sparks and protects the electrical system from short circuits.
Wear protective gloves while handling the battery. Gloves shield your skin from acid residue, dirt, and sharp edges around the compartment.
Never install the battery with reversed polarity. Connecting the positive and negative cables to the wrong terminals can damage the scooter’s wiring and electrical components.
Do not overtighten the terminal screws. Tight connections are important, but applying too much force can strip the threads or crack the terminal housing.
Keep the battery upright during installation. Tilting it may cause fluid leakage in traditional AGM units or stress on the casing.
Avoid touching both terminals with a tool at the same time. This creates a direct short that can damage the battery and cause injury.
Dispose of the old battery responsibly. Take it to an authorized recycling center or a motorcycle parts store that accepts used batteries.
After Replacement: Quick Checks
Turn the ignition key to the on position and check that the headlights and dashboard lights illuminate with full brightness. A steady light output confirms the battery is supplying proper voltage.
Press the starter switch and listen to how the engine turns over. The motor should crank smoothly and start without hesitation. If the starter sounds weak, recheck the terminal connections for tightness.
Inspect the battery compartment once more to ensure the unit is seated firmly. A secure fit prevents vibration from loosening the cables during rides.
Use a multimeter to confirm voltage if you want an exact reading. A new fully charged 12-volt AGM battery should measure around 12.6 to 12.8 volts. Anything below 12.4 volts indicates the charge is low and the battery may need additional charging.
Take a short ride after installation. Monitor the scooter’s performance and confirm that lights and electronics remain stable. This ride also ensures the charging system is functioning correctly by replenishing the new battery.
Maintenance Tips to Extend Battery Life
Ride your Honda Ruckus regularly to keep the battery charged. Short or infrequent rides do not allow the charging system to restore full capacity.
Use a smart trickle charger if you store the scooter for more than two weeks. A maintainer keeps the battery at the correct level without overcharging.
Check the terminals once a month for signs of corrosion. Clean them with a brush and apply a small amount of dielectric grease to prevent buildup.
Keep the battery and its compartment dry. Moisture accelerates corrosion and can cause electrical issues.
Avoid leaving the ignition switch or lights on when the engine is not running. Even a short time of unnecessary use can drain a small scooter battery.
Monitor the voltage with a multimeter every few months. A healthy reading above 12.4 volts indicates the battery is holding charge properly.
Replace the battery when it shows consistent signs of weakness. Delaying replacement puts extra strain on the starter motor and charging system.
Conclusion
Replacing the battery on your Honda Ruckus is a simple repair that restores the scooter’s reliability. With the right replacement model and a few common tools, you can complete the process in minutes.
A careful installation ensures the electrical system functions correctly and prevents unnecessary wear on other parts. Taking the time to confirm the battery is secure and fully connected protects you from problems on the road.
Regular maintenance helps you avoid sudden failure and keeps the scooter ready for daily use. Checking the voltage, cleaning the terminals, and storing the scooter correctly all extend the life of the new battery.
By following these steps, you save the cost of shop labor, gain confidence in your ability to perform basic maintenance, and keep your Honda Ruckus in dependable condition.
FAQs
What type of battery does a Honda Ruckus use?
The Honda Ruckus uses a 12-volt AGM battery, with the most common model being the Yuasa YTZ7S. Equivalent batteries from other brands also fit, as long as they match the same size, voltage, and terminal layout.
How long does a Honda Ruckus battery usually last?
A Ruckus battery typically lasts between two and four years. The exact lifespan depends on usage, climate, and storage habits. Regular charging and proper maintenance help extend its life.
Can I use a lithium battery in a Honda Ruckus?
Yes, some riders choose lithium batteries such as the Shorai LFX07L2. Lithium batteries are lighter and often hold charge longer, but they cost more than standard AGM options. Always check compatibility before switching.
Why does my Honda Ruckus battery keep dying?
A battery that dies often may be old, poorly maintained, or exposed to long periods without charging. It can also signal a problem with the charging system, such as a weak stator or regulator.
How do I dispose of an old Ruckus battery?
You should never throw a scooter battery in household trash. Take it to a recycling center, auto parts store, or motorcycle dealer that accepts used batteries. Proper disposal prevents environmental harm and follows local regulations.