Have you ever thought about turning your Honda Ruckus into something more than just a basic scooter? I know the feeling. The first time I saw a Honda Ruckus Chopper, I was hooked. It wasn’t just any scooter — it had style, personality, and looked amazing on the road. That’s when I knew I wanted to build one myself.
Customizing a Honda Ruckus into a chopper isn’t just about making it look cool. It’s about creating something unique, from stretching the frame to adding bigger tires and even upgrading the engine for more power. Whether you want better performance, a custom look, or just a ride that stands out, this guide will show you how to make it happen.
In this article, we’ll go over everything you need to know, from picking the right parts to installing them step by step. We’ll cover stretch kits, engine swaps, custom paint jobs, and more. So if you’re ready to transform your Honda Ruckus into the ultimate chopper, let’s get started!
Table of Contents
ToggleWhat Is a Honda Ruckus Chopper?
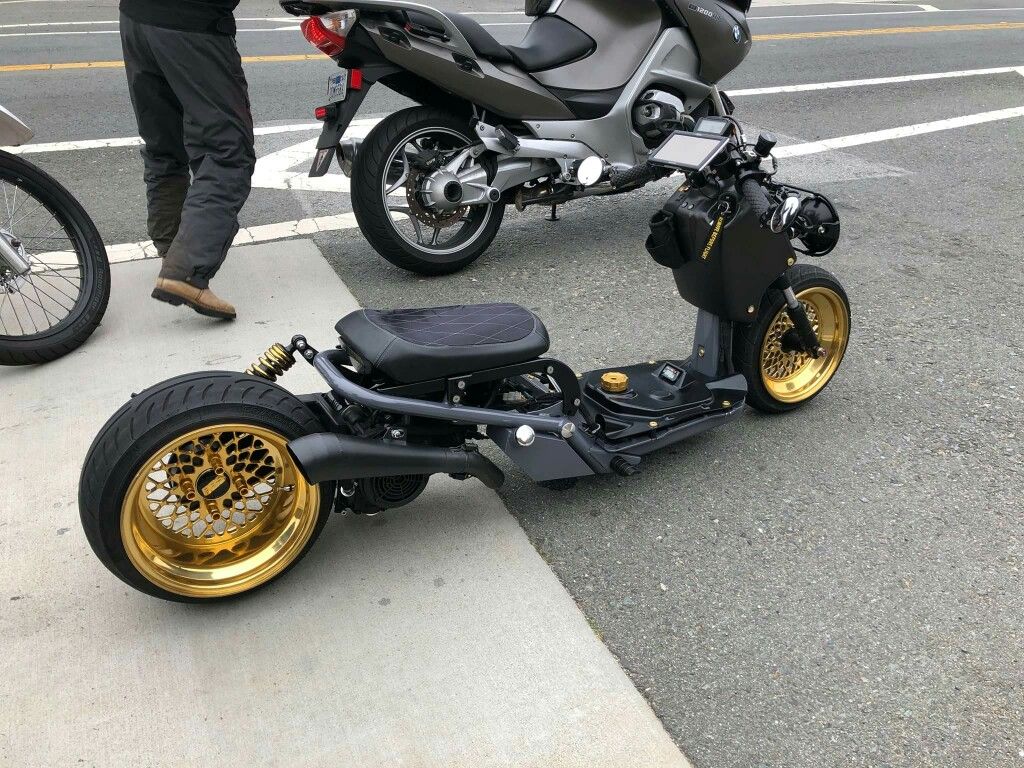
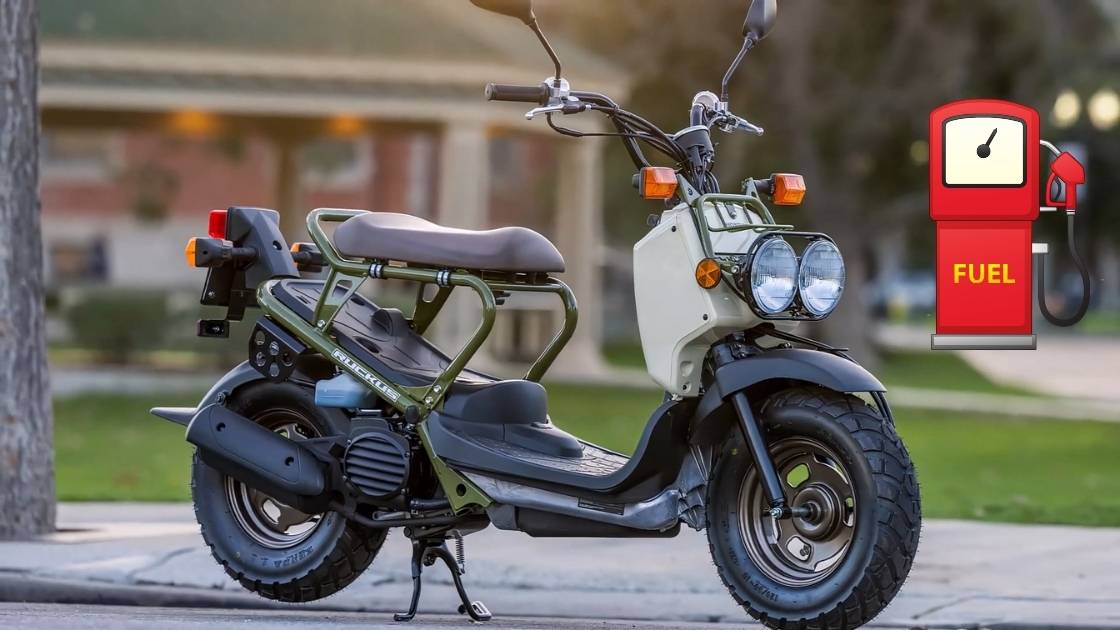
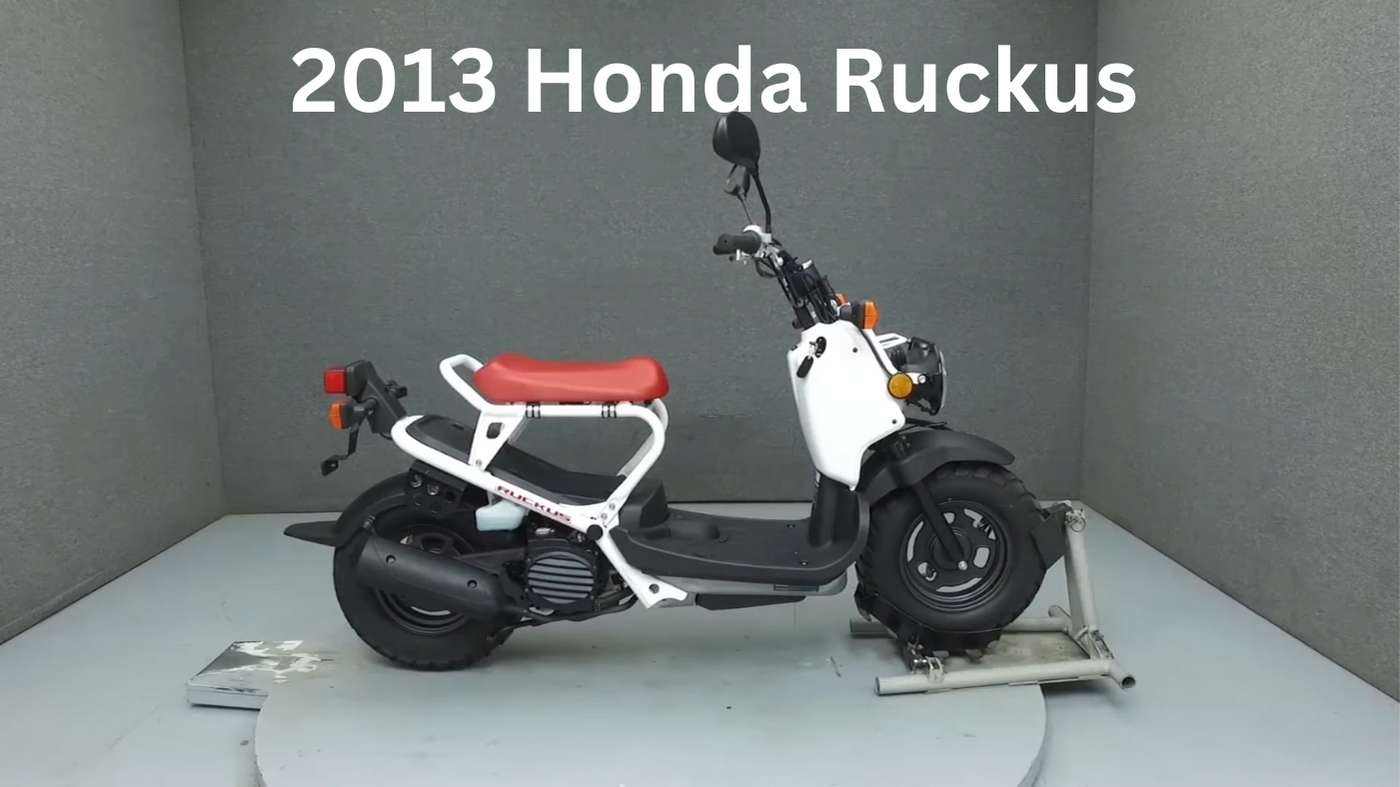
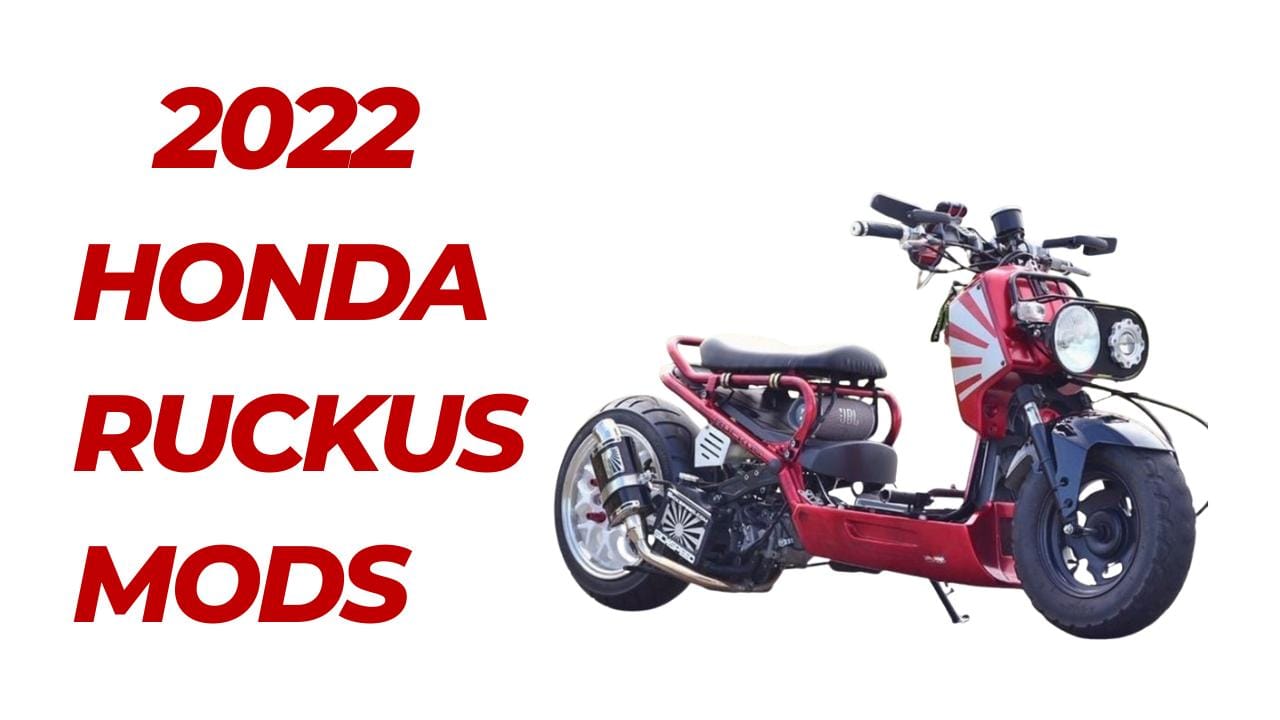
So, what exactly is a Honda Ruckus Chopper? A Honda Ruckus is a small scooter with a 50cc engine. It’s light and great for city rides. Some people modify it with bigger engines. But when we talk about a Honda Ruckus Chopper, it’s a whole new thing. The frame is stretched, the suspension is lowered, and the tires are bigger. It’s made to look like a classic motorcycle chopper, giving it a bold custom look.
The thing is, a Ruckus Chopper isn’t just about looking cool (though it definitely does that). It’s about making the Ruckus your own, reflecting your style and personality. For many, it’s the ultimate DIY project — you get to build something unique and ride it around town like a boss.
Why Customize a Honda Ruckus Into a Chopper?
Why would someone take a perfectly good Honda Ruckus and turn it into a chopper? Well, there are a few good reasons.
First, the Honda Ruckus Chopper looks absolutely badass. A stretched and lowered Ruckus with wide tires and custom handlebars? It’s a head-turner, no doubt about it. You won’t find many scooters that have this much attitude.
Second, it’s all about personalization. If you’re like me, you don’t want the same scooter as everyone else. You want something that screams you. A custom Ruckus lets you show off your style. You can add a fun paint job, a different exhaust, or a cooler-looking seat.
It’s also a way to improve how it rides. The stock Honda Ruckus is fun, but you can make it faster. With engine upgrades like a GY6 or a 150cc swap, it becomes a mini rocket. Better performance, more speed, and just plain fun on the road.
How to Get Started: Key Considerations Before Modifying Your Honda Ruckus
Before you jump into building your Honda Ruckus Chopper, there are a few things you’ll need to consider. Trust me, it’s better to plan ahead than to realize halfway through that you’ve bitten off more than you can chew.
Budget
The first question is: how much are you willing to spend? Converting a Honda Ruckus into a chopper isn’t exactly cheap. Sure, you can go the budget route, but if you’re going for premium parts — think custom exhausts, wide tire kits, and stretch kits — the cost adds up quickly. On average, a full Ruckus chopper build can cost anywhere from $1,000 to $5,000, depending on how crazy you want to get.
Legality
Another big thing is whether your modified Ruckus will be street-legal. Different places have different rules for scooter mods. Check your local laws before you change the frame or upgrade the engine. Ruckus choppers are fun, but not if you can’t legally ride them.
Tools and Skills
Finally, ask yourself: do you have the tools and the know-how? A lot of the work can be done in your garage if you’re handy with wrenches and welding, but some things (like electrical work) might need professional help. If you’re not confident in your skills, it’s worth consulting a pro, at least for the tricky bits.
Essential Parts for a Honda Ruckus Chopper Conversion
Here’s where things get fun — picking out the parts! The key to a successful Honda Ruckus Chopper conversion is choosing the right components. These are the building blocks of your custom ride.
Frame Stretch
One of the first things people notice about a Ruckus Chopper is how long it is. That stretched-out look is achieved by modifying or replacing the frame. You can buy a Honda Ruckus stretch kit to extend the frame yourself or have it custom-built. Either way, this is one of the defining features of a chopper-style Ruckus.
Suspension
If you’re stretching your Ruckus, you’ll want to lower it too. A lowered Honda Ruckus sits closer to the ground, giving it that mean, aggressive look. Upgrading the suspension also improves the handling, which is a nice bonus when you’re riding on rougher terrain.
Wide Tires and Custom Handlebars
No Honda Ruckus Chopper is complete without a wide set of tires. A wide tire kit not only makes your scooter look beefier, but it also improves grip and stability on the road. While you’re at it, throw in some custom handlebars to complete the chopper aesthetic.
Where to Source the Best Parts for a Honda Ruckus Chopper
Now that you know what you need, where do you find it? There are a lot of options out there, but here’s what I’ve learned from experience.
Online Retailers and Custom Shops
The easiest place to start is online. Websites like Ruckhouse, Scooterworks, and Steady Garage sell Ruckus chopper parts. They offer everything from custom exhausts to stretch kits. You can also compare prices to match your budget.
If you want something more unique, consider hitting up local custom shops. Many places that specialize in motorcycle mods can help you source or even fabricate custom parts for your Ruckus.
I’ll pause here and continue from where we left off. Does this flow meet your expectations so far? Let me know if you want any changes or additions!
Great! I’m glad the article is heading in the right direction. I’ll continue from where we left off, keeping the tone friendly and ensuring the information is accurate and easy to digest. Let’s pick it up from section 6.
How to Stretch a Honda Ruckus for the Chopper Look
One of the most iconic aspects of a Honda Ruckus Chopper is that stretched frame. It not only gives the scooter a unique, elongated look but also changes the riding experience. Stretching your Ruckus might seem hard, but with a stretch kit, it’s easy to manage, even if you’re not a mechanic.
Using a Stretch Kit
Most people, myself included, start with a Honda Ruckus stretch kit. These kits have everything you need to extend the frame. They also come with clear instructions, so even if it’s your first time working on a scooter, you’ll know what to do. You’ll need basic tools like a wrench set, and it helps to have a bit of mechanical know-how. Most kits will let you stretch the frame anywhere from 6 to 12 inches — how far you go is totally up to your preference.
Things to Watch Out For
The trickiest part of stretching the frame is keeping everything aligned. If you don’t line it up correctly, you could end up with a wobbly ride, and that’s the last thing you want after all this work. Make sure the rear wheel is straight, and check everything before tightening the bolts. Once the frame is stretched, your scooter’s balance will change, so you may need to adjust the suspension to fit the longer frame.
Lowering the Honda Ruckus: Achieving the Chopper Style
Once you’ve stretched the frame, the next step is to lower it. A lowered Honda Ruckus sits close to the ground. This not only looks cool but also adds to the chopper style. Lowering your Ruckus is easy, especially if you already installed a stretch kit.
You can lower your Ruckus by modifying the front fork or using lowering brackets. Some people like to use aftermarket suspension made for lowering. No matter which option you choose, make sure it doesn’t hurt your ride quality. Lowering too much can make the ride rough, especially on bumpy roads.
Comfort vs. Aesthetics
There’s a bit of a trade-off here. Lowering your scooter looks awesome, but it can affect your comfort on longer rides. The key is finding the right balance. For me, lowering it by about 2 to 3 inches was perfect — it looked great without sacrificing too much ride comfort. But if you’re going for show over function, you can go even lower.
Best Engine Upgrades for a Honda Ruckus Chopper
One of the most exciting parts of building a Honda Ruckus Chopper is upgrading the engine. The stock Ruckus engine is 50cc, which is good for city riding. But if you want to keep up with traffic or go faster, you’ll need more power.
GY6 Engine Swap
The most popular upgrade by far is the GY6 engine swap. This swap replaces the 50cc engine with a 150cc, giving your scooter a huge boost in power and speed. With the GY6, you’re looking at speeds of up to 60-65 mph, depending on how you tune it. However, the engine swap isn’t a plug-and-play job. You’ll need to make a few adjustments to the frame and wiring to accommodate the larger engine, but the results are well worth it.
Other Performance Mods
If a full engine swap isn’t in your budget, there are smaller performance mods you can do. Improving your Honda Ruckus Chopper’s performance is easy and cheap. You can upgrade the exhaust, add a better air filter, or adjust the carburetor. I chose a custom exhaust. It made my bike sound great and helped with airflow. This gave me a little more speed.
Choosing the Perfect Wheels and Tires for a Honda Ruckus Chopper
Another critical element of the Honda Ruckus Chopper build is the wheels and tires. A wide, beefy tire can make all the difference, both in terms of looks and handling.
Wide Tire Kits
Most people opt for a wide tire kit to give their Ruckus Chopper a more aggressive stance. A wider rear tire not only looks cooler but also gives you more grip on the road. Plus, it adds stability, especially when you’re riding at higher speeds after an engine upgrade. You can find tire kits that include everything you need, from the tire itself to the spacers required to fit it onto the stretched frame.
Rim and Wheel Choices
As for rims, go with something that complements your chopper style. Custom rims are a great way to make your Honda Ruckus Chopper stand out. Whether you go for a chrome finish or something more subtle, the wheels can really make the overall design pop.
Lighting and Electrical Mods for a Ruckus Chopper
No custom chopper is complete without some slick lighting. Whether you’re riding at night or just showing off your build, lighting plays a big role in the overall look of your Honda Ruckus Chopper.
Headlights and Taillights
The stock headlights are functional but not exactly stylish. Upgrading to a custom headlight makes your chopper look better and helps you see more clearly. You can choose LED lights because they are bright and use less energy. Don’t forget the taillights—there are many sleek, low-profile options to finish the back of your bike.
Underglow and Auxiliary Lights
For those who really want to turn heads, adding underglow lighting is a fun option. It’s not essential, but if you’re planning on showing off your Honda Ruckus Chopper at night, it adds that extra “wow” factor. Auxiliary lights can also be added for safety and style.
Custom Seats for a Honda Ruckus Chopper
Let’s talk about comfort — specifically, the seat. While the stock seat on a Honda Ruckus isn’t bad, it’s far from what you want for a chopper.
Custom Seat Options
A lot of riders opt for a custom single-seat setup. Not only does it give the Honda Ruckus Chopper a true chopper look, but it also makes your ride more comfortable. You can pick leather or vinyl and choose a design that matches your bike.
Seat Height and Position
Keep in mind, though, that your seat height will affect your ride. A lower seat looks cool, but it can make longer rides uncomfortable if you go too low. I found that keeping the seat just a bit lower than stock was a perfect balance between style and function.
Paint and Finish Options for a Honda Ruckus Chopper
The final touch for your Honda Ruckus Chopper is the paint job. This is where you can really get creative and make your build stand out.
Paint vs. Wrap
You’ve got two main options here: custom paint or a wrap. Paint jobs tend to be more durable, but they’re also more expensive. A good custom paint job can range from $500 to $2,000 depending on complexity. Wraps, on the other hand, are a cheaper alternative and can be just as eye-catching. They’re also easier to change if you get bored of the design.
Popular Paint Styles
For a true chopper look, many people go for matte or metallic finishes. I’ve seen some amazing Honda Ruckus Choppers with chrome detailing or even flame graphics. Whatever you choose, make sure it complements the overall aesthetic of your build.
Suspension and Brake Mods for a Smooth Ruckus Chopper Ride
Upgrading the suspension and brakes isn’t just about looks — it’s about performance. With all the other mods, you’ll want to make sure your Honda Ruckus Chopper rides smoothly and safely.
Suspension Upgrades
If you’ve stretched and lowered your Ruckus, you’ll definitely want to upgrade the suspension. Aftermarket shocks are designed to handle the added weight and length of the frame, giving you a smoother ride. Look for shocks that are adjustable, so you can tweak the ride height as needed.
Brake Upgrades
Safety first! With a faster engine and a stretched frame, you’re going to need better brakes. Upgrading to better brakes will give you more stopping power. You will also have more control when riding at higher speeds.
Maintenance Tips for Your Custom Honda Ruckus Chopper
Once your Honda Ruckus Chopper is built, the work doesn’t stop. Regular maintenance is key to keeping your ride in top shape.
Cleaning and Preservation
A custom build requires extra care. Make sure you regularly clean your scooter to keep dirt and debris from building up on your custom parts. If you’ve got a custom paint job, use the right products to avoid damaging the finish.
Troubleshooting Common Issues
Every custom build will have its quirks. Whether it’s adjusting the suspension or fixing a loose bolt on the frame, stay on top of any small issues before they become big problems. Keep a basic tool kit with you for any quick fixes on the road.
Pros and Cons of Owning a Honda Ruckus Chopper
By now, you’ve got a pretty good idea of what it takes to build a Honda Ruckus Chopper. But before you take the plunge, let’s take a moment to weigh the pros and cons. After all, customizing a scooter is a big investment, both in time and money, and you want to be sure it’s the right decision for you.
Pros
Unique Style: No two Honda Ruckus Choppers are the same. Your build will be one-of-a-kind, turning heads wherever you go. Whether you’re at a bike show or just cruising around town, you’re going to get attention.
Customization Potential: The Ruckus is incredibly versatile. You can change everything from the frame and tires to the engine and exhaust, giving you full creative control.
Improved Performance: With the right upgrades, like an engine swap or GY6 conversion, you’ll get more power and speed than the stock model. Plus, you can make handling improvements with better suspension and brakes.
Community and Fun: There’s a strong community of Ruckus chopper builders out there. It’s a fun project to tackle, and you can connect with other enthusiasts to share tips and advice. Building and riding your custom Honda Ruckus Chopper can be incredibly rewarding.
Cons
Cost: Customizing a Honda Ruckus into a full-fledged chopper isn’t cheap. Between parts, tools, and labor, the cost can easily run into the thousands. You’ll need to budget carefully.
Time and Effort: A project like this takes time. If you’re doing it yourself, expect to spend several weekends (or more) working on your scooter. And if you run into issues or need professional help, the timeline can stretch even further.
Comfort Trade-offs: A Honda Ruckus Chopper looks great, but lowering the frame can make it less comfortable, especially on long rides. You’ll need to balance looks with comfort.
Legal and Insurance Issues: In some places, big changes to your Honda Ruckus might cause legal or insurance problems. Be sure to check local rules before making upgrades, especially to the engine.
Conclusion: Is a Honda Ruckus Chopper Worth It?
At the end of the day, the answer depends on what you’re looking for. If you love working on projects, enjoy standing out, and are ready to invest time and money, building a Honda Ruckus Chopper is worth it. It’s more than just a scooter — it shows off your creativity and becomes a unique ride.
However, if you’re looking for something quick and easy or aren’t ready for the commitment that comes with custom builds, you might want to reconsider. The Honda Ruckus Chopper is a labor of love, but for those who are passionate about it, the payoff is incredible. For me, every bit of effort I put into my Ruckus Chopper was worth it when I took that first ride.
Frequently Asked Questions
Can you turn any Honda Ruckus into a chopper?
Yes, nearly any Honda Ruckus can be converted into a chopper. However, older models may require additional modifications or replacements to handle the upgrades, such as a GY6 engine swap or frame stretch.
Is a Honda Ruckus chopper street-legal?
In most regions, a Honda Ruckus Chopper is street-legal as long as it meets local safety and emission regulations. Always check your local laws, especially if you’re upgrading the engine or modifying the frame.
How much does it cost to build a Honda Ruckus chopper?
Costs can range from $1,000 to $5,000 depending on the parts you choose and whether you do the work yourself. A full Honda Ruckus Chopper build can get expensive, but careful planning and sourcing can help you stick to a budget.
How does a GY6 conversion improve a Honda Ruckus chopper?
A GY6 conversion swaps the stock 50cc engine for a 150cc engine, greatly improving speed and torque. This upgrade transforms your Honda Ruckus Chopper from a simple city cruiser to a powerful, faster machine.

